
Client Contacts
You can add non-client contacts to a client from the client profile. This is helpful when the client has other people that need appointment reminders, a separate portal channel and to handle billing for the client. The most common scenario where this functionality would be useful is the child/parent scenario.
Contacts have the ability to:
- Receive appt communications:
- Reminders
- Confirmations
- Scheduled Email and SMS Messages
- Telehealth Links
- Have access to their own portal
- The message channel is only between the contact and the practitioner
- The contact can manage the clients appointments
- The contact can manage the clients saved cards and and pay the client's invoices via the portal
- The contact can view forms via the portal
- The contact can be sent forms have their signature requested via the portal
- Have access to the booking widget
- The contact can manage the clients appointments via the booking widget.
- Can complete forms
- Forms can be sent from the clients profile. These forms appear on the clients timeline.
Adding a Contact to a Client
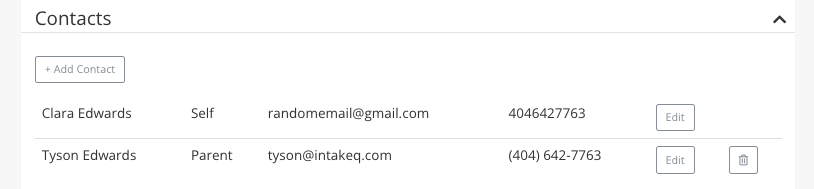
To define a contact for a client, go to the client and scroll down to the "Contacts" section.
- Click "+ Add Contact" to enter a new contact for the client.
Note: You may notice the client is also listed as a contact. This is so you can disable the notifications for the client if needed. For situations where the client is a child and does not have a phone or email, you can list the parents as contacts and disable notifications to the client's email if they are the same as the parent.
Contact Information Screen:

You can define the name, email, phone number and relationship for the contact. These are not required fields but the contact must have these filled out if you want them to receive notifications. The same preferred contact method will be used for both the client and their contacts.

Contacts can receive appointment related reminders, confirmations, scheduled SMS/emails and even manage the client's appointments via the booking widget. There are checkboxes that correspond to each item below.
Note:The same preferred contact method will be used for both the client and their contacts.
1. Appointment Reminders
1. Includes appointment reminders related to appointments for the client
2. Appointment Confirmations
1. Includes appointment confirmations, appointment cancellation notifications, and missed appointment notifications
3. Scheduled Emails and SMS
1. Any scheduled emails or SMS related to the appointment
4. Can manage appointments
1. A client's contact can log into the booking widget and reschedule, schedule and delete appointments for the contact
Booking Widget: How to Manage Client Appointments as a Contact
The contact can use their own email to log into the booking widget which will give them access to the client's appointments. Once logged into the widget, the contact can add, reschedule or delete appointments.

Inviting Contacts to the Secure Portal:
A client's contact can also be invited to the portal. This will provide a new messaging channel between JUST the contact and the practitioner. This will also give the contact the ability to pay for invoices, manage appts, view shared documents, complete forms and complete signatures for the client.
You can currently invite a contact to the portal in two ways:
- Via the Contacts list on the client profile
- From within the portal itself on the portal messages page
Multiple Clients with the same Contacts Details:
- The same email address can be used by the contacts for different clients (e.g. the parent of 2 children can be added as a contact under each child, with the same email).
- Contacts of multiple clients can switch between clients in the portal. Clicking the down arrow beside the profile name will display the list of clients that are linked with the contacts email. Select and click on the Client's Name to switch to the client's portal account.

- A person can also have a portal as a contact and a portal as a client, using the same email address. (e.g. A parent both as a client and contact for 2 children listed as clients)

Portal Messaging Page:

When inviting contacts to the portal, you have the following permissions:
- Can view forms
- This allows the contact to view and forms between the practitioner and the client
- Can view shared documents
- This allows the contact to view any shared documents between the client and the practitioner
- Can manage billing
- This allows the contact to view and pay invoices and modify saved credit cards
- Note: We cannot send GFE's to the contact at this time.
- This allows the contact to view and pay invoices and modify saved credit cards

Once the contact has portal access, you can see the relationship to the client in the portal messages list.

Sending Portal Messages to Contacts
You can message the contact from the client profile or the Portal itself.
Note: The "Messages" tab on the client profile will always ONLY be the messages from the client, not the contacts.

Adding New Client with Contacts
You can also add and define contacts when adding new client.

1. On the "Add New Client" screen, click "Add Contact".
2. Enter contact details on the Contact information screen then click "Save Contact". All contacts that are added are listed on the Add New Client screen and can still be edited before saving.
Adding Contacts for a New Client with no email or phone number.
The Add Contact feature can also be used when adding new client that has no email address or phone number (e.g. Minor). The contact person (e.g. Parent/s) information, roles and access can also be defined all at once when adding new client with no email or phone. Follow the same process but this time, leaving the client email/phone number blank.

Sending Forms to Contacts for Client's with no email
- You can send forms to contact through the dashboard's "Send Form to Client" option.
- You can also send forms to contact in the Booking page. In the appointment dialog box, click the "Send Form To" up and down arrow to show the list of the client's contacts. Then click on the contact you are choosing to send the form to.
- [RecipientFirstName]
- [RecipientLastName]
- [RecipientName]
Scheduled Message Placeholders
There is support for Contact placeholders so that the same reminder templates can be addressed to contacts and clients.
Billing Recipients
Nothing has changed here yet. We will be working on merging some of this functionality.
Don't hesitate to email us at hello@intakeq.com if you need assistance!