.png)
Book an Appointment Manually (by Staff)
PracticeQ offers two ways for staff to book appointments for clients.
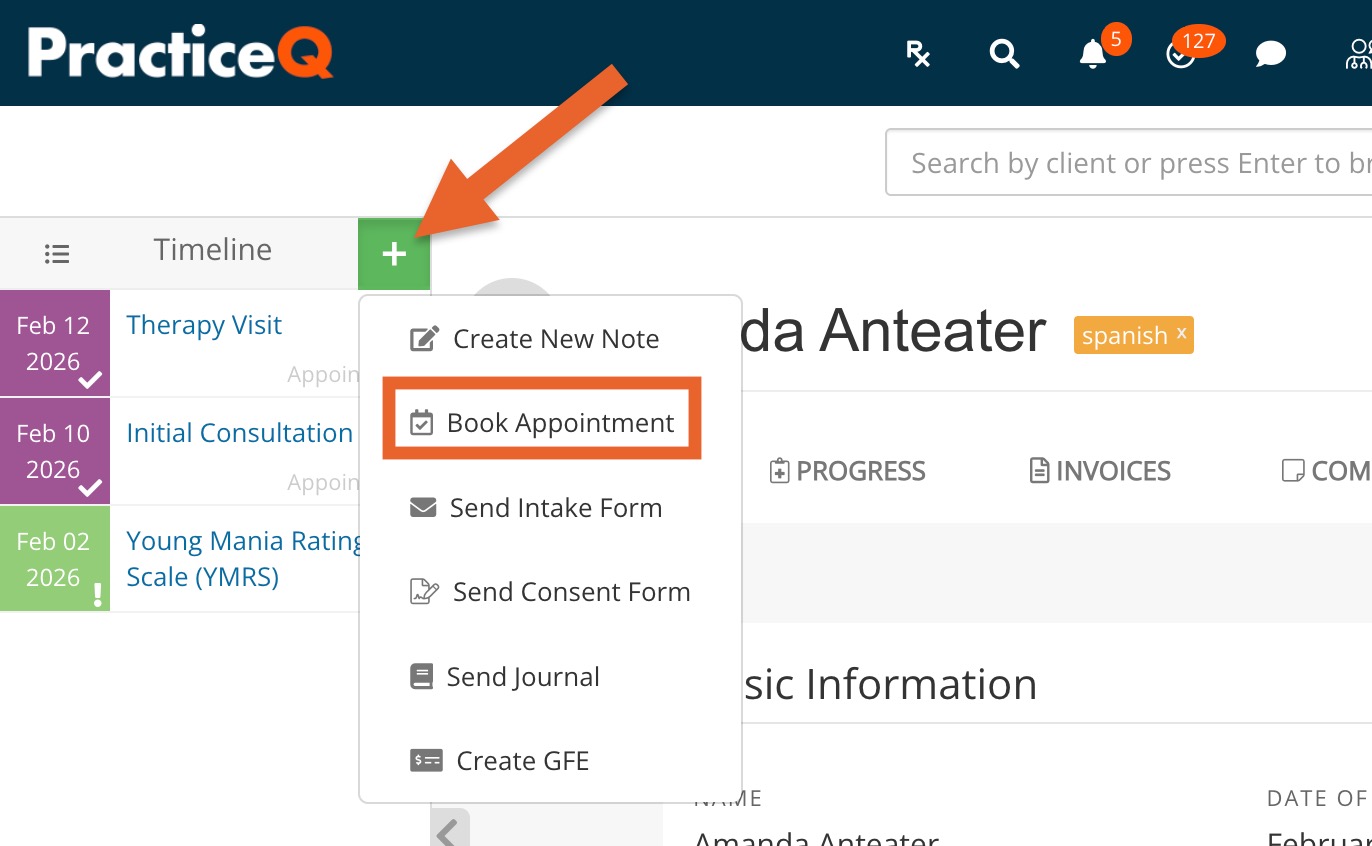
Option 1: From the Client Timeline
- Click the magnifying glass icon and search the client's name.
- Open the client's profile.
- Click the plus sign icon from their timeline on the left.
- Select Book Appointment.
- The Add Appointment dialog will open. See below for details.

Option 2: From the Booking Calendar
- Click Bookings to open your booking calendar.
- Click the day you wish to schedule the client.
- The Add Appointment dialog will open.
- Start typing your client’s name in the first field.
- If the client already exists in your account, they will appear in the dropdown for quick selection.
- If the client does not yet exist in your account, continue booking. PracticeQ will automatically create a new client profile using the information you enter.
- If the client already exists in your account, they will appear in the dropdown for quick selection.
- See the next section for more steps.
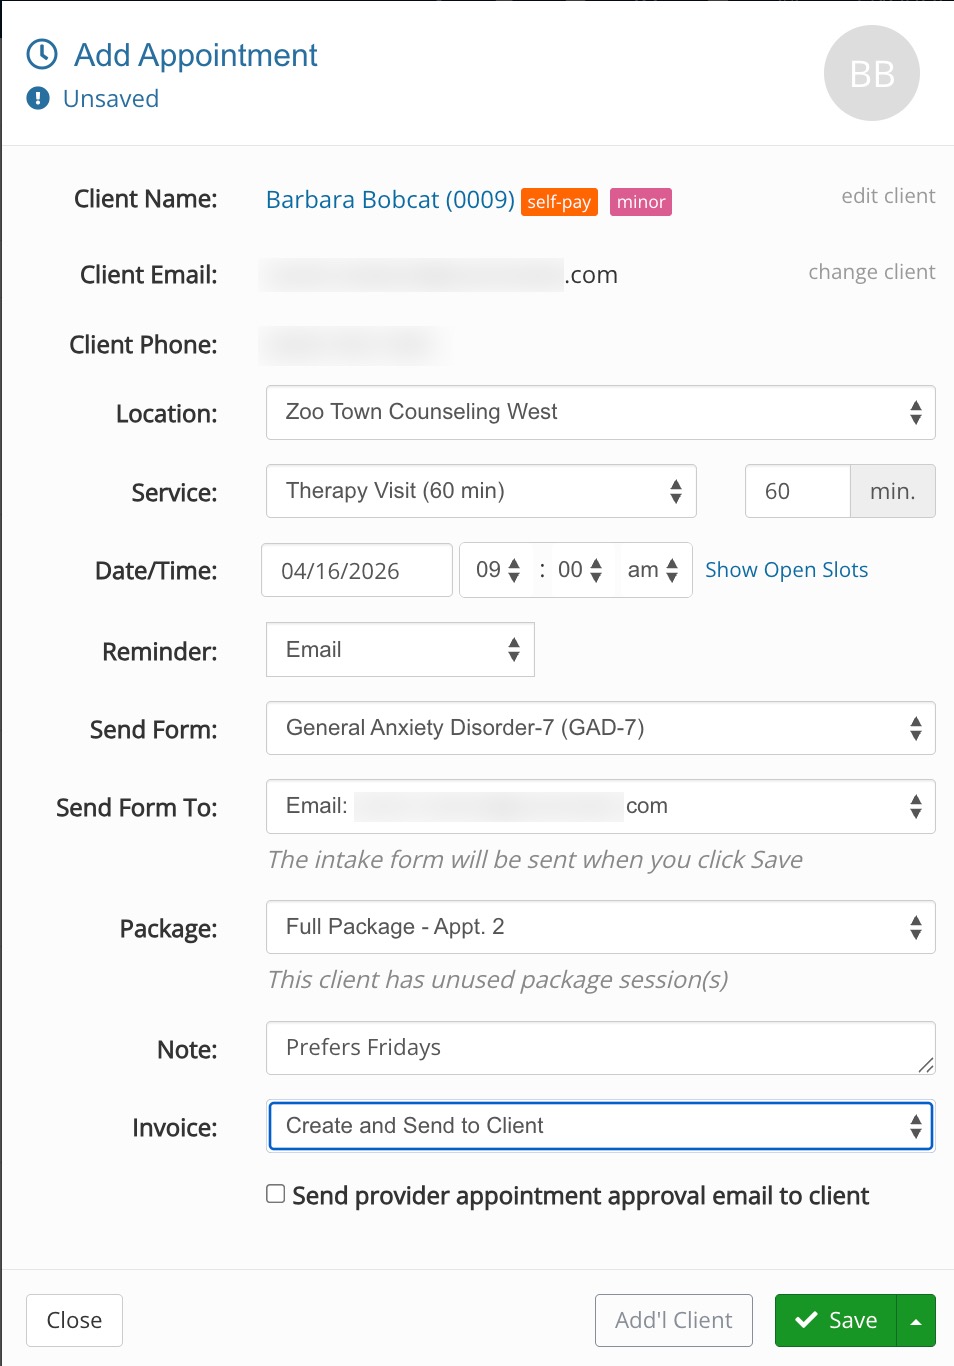
Enter the Appointment Information
- By default, the required fields are First Name, Last Name, and Email.
- Select the Location of the appointment.
- Select the Service to be scheduled. The duration will populate automatically based on the service details, but you may edit it if you wish.
- Double-check the Date/Time. If you would like to preview what your booking widget shows as available, click Show Option Slots.
- In the Reminder field, select Yes or No, or Email, Text Message (SMS) or Phone Call.
- In the Send Form field, you may see a form automatically populate based on your service setup, but you can change the selection using the dropdown menu if needed. The form you select will send automatically to the email address shown once the booking is complete.
- If the client has a Contact on file, you can choose to send the form to the contact instead.
- If the client has purchased an appointment package and the service is included in it, you will see a Package dropdown. Select the package from the dropdown so it’s properly tracked. This step is important — skipping it will prevent the session from being applied to the package.
- Add any relevant details in the Note field. This is optional.
- In the Invoice dropdown, choose an action if needed:
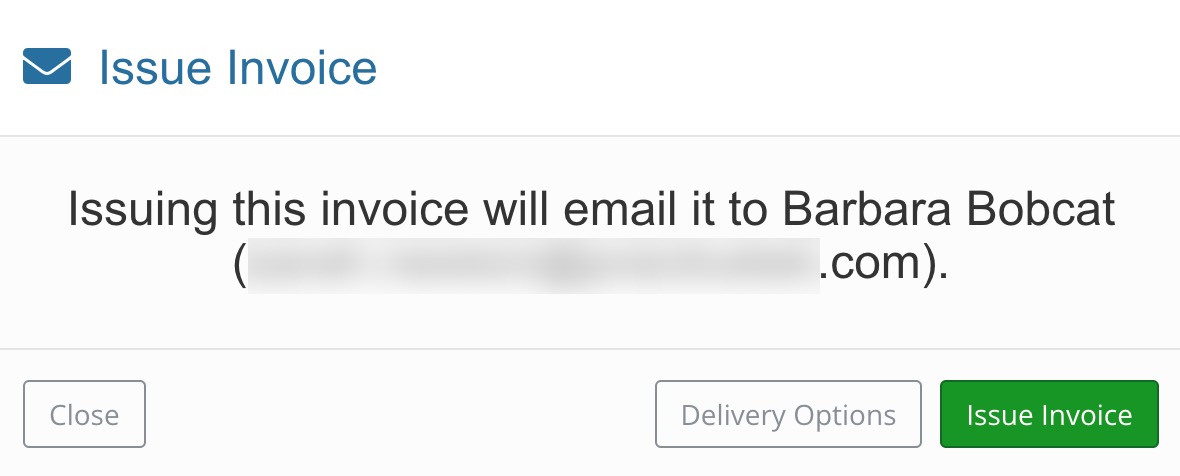
- If you select Create and Send to Client, you will be prompted to send the invoice immediately after saving the appointment.
- Click Save to complete the booking.
- If you selected to send an invoice, the Issue Invoice dialog will appear next — click Issue Invoice to finalize it.
If you prefer not to require an email address, click More → Settings. Then select the Settings tab and check the box labeled Allow Appointments without Email.
Your options will depend on what you enter under the Appointment Reminder heading in Bookings → Booking Settings, in the Settings tab.

