.png)
Custom CSS for Booking Widget
Ready to personalize your booking widget? Try these popular CSS (Cascading Style Sheets) customizations to create the look you want.
IMPORTANT:
CSS customizations are the sole responsibility of the user/practice, including the practice’s staff, resources, and any third-party or technical support they choose to use. IntakeQ/PracticeQ does not provide, manage, or maintain custom CSS configurations.
Please note: IntakeQ/PracticeQ does not support or troubleshoot errors, issues, or unexpected results caused by custom CSS. Any CSS-related issues must be reviewed and resolved by the user/practice or their qualified technical resource.
What if my CSS customizations don't work/do not turn out the way I intended?
- Remove the customization code.
- Ask your clinic tech support team for assistance.
Get Started:
- Click Bookings, then Booking Settings.
- Select the Widget tab.
- Scroll down to the Customize the Widget HTML <head> tag heading.
- Click the click here link and enter your custom CSS in the field provided.
Booking Widget Customization Options
For the Booking widget edits below, all style edits MUST be wrapped in a style tags. For example, hiding the booking hours would be: <style> .hours {display:none;} </style> Remember to apply the <style> tag at the beginning of all your edits and again at the end; do not apply it to the beginning and end of each edit. Doing so will cause only one edit to take effect.
DO NOT USE <script> as this will create errors.
Jump to a Section
- Change Booking Widget Background Color
- Change Booking Widget Button Color
- Change Category Text Background Color
- Disable the "Manage Appointments" Link
- Hide your Booking Hours
- Hide Booking Client Notes
- Hide 'Schedule Later' button on Packages
- Modify the Client information fields in Booking widget (Multiple Fields)
- Insert Preferred Language in your Booking Widget
- Replace "Manage Appointments" Text to Preferred Wording Via CSS
- Add Text to Final Pages of Booking Widget
- Add Text to Calendar Selection of Booking Widget
- Add Text to Header of Booking Widget
Change Booking Widget Background Color
Use this to customize the overall background color and/or the calendar background for your booking widget.
body, .spinner {background-color:#fdf7f0 !important;}
.calendar .current-appointment .current {background-color:#fdf7f0 !important;}
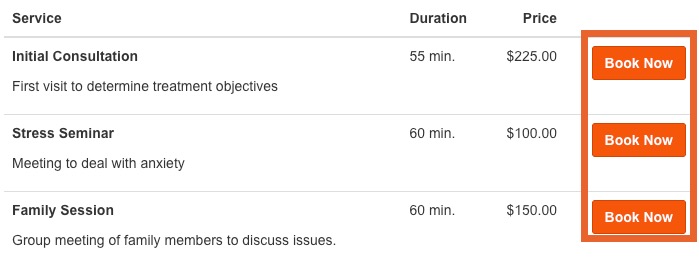
Change Booking Widget Button Color
NOTE: Changing booking widget button color is NOT ADVISED; iPhones/iPads update often and break the widget when using this!
.btn-success, .btn-success:disabled, btn-success:focus, .btn-success:hover, .btn-success[disabled]:hover, .btn-warning, .btn-warning:focus, .btn-warning:hover, .btn-primary, .btn-primary:focus, .btn-primary:hover, .btn-primary:disabled {background-color:#000000 !important; border-color:#000000 !important;}
.btn-info:hover, .btn-info:focus, .btn-info:active, .btn-info.active, .btn-info.active:hover, .open .dropdown-toggle.btn-info {background-color:#000000 !important; border-color:#000000 !important;}
Change Category Text Background Color
Use this to customize the color of the category blocks in your booking widget.

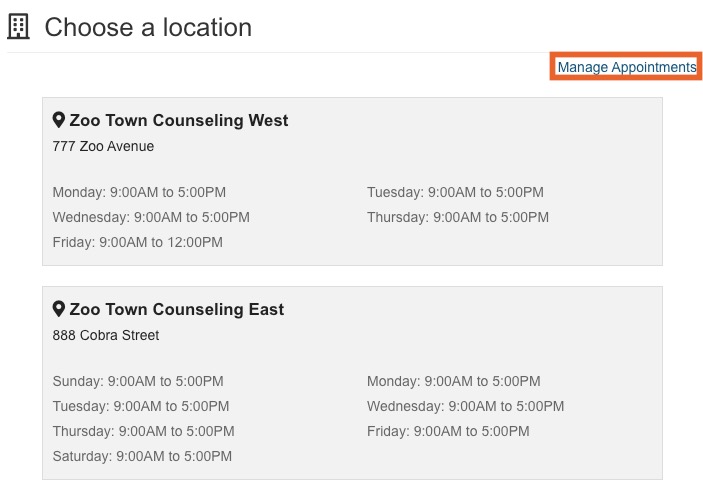
Disable the "Manage Appointments" Link
Use this if you wish to remove the Manage Appointments link that appears on the Choose a location, Choose a category, Choose an option, and the Client Information pages, as well as in the Appointment Confirmation email that the client receives.
#manage-appointments {display:none;}
Hide your Booking Hours
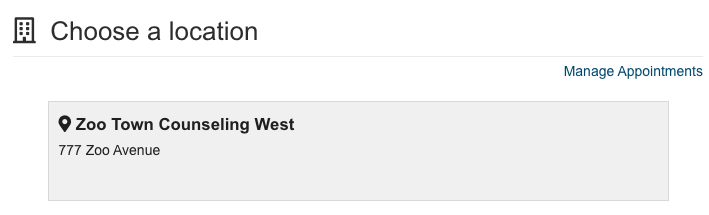
Use this if you do not wish to display the booking hours for each location on the Choose a location page.
.hours {display:none;}

Hide Booking Client Notes
Use this if do you not wish to offer the Note field to clients when they are booking appointments on your widget.
#widget-container .note-block {display:none;}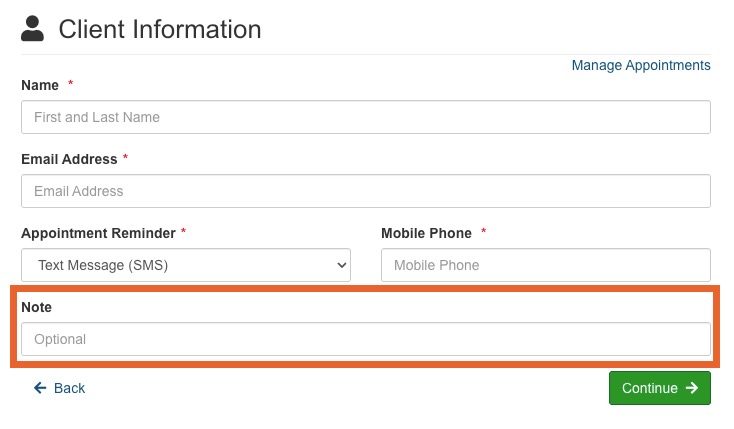
Hide 'Schedule Later' button on Packages
Use this if you want your clients to schedule all their package appointments at one time.
.row.current-appointment .col-md-12 .current .btn.btn-default{display:none;} 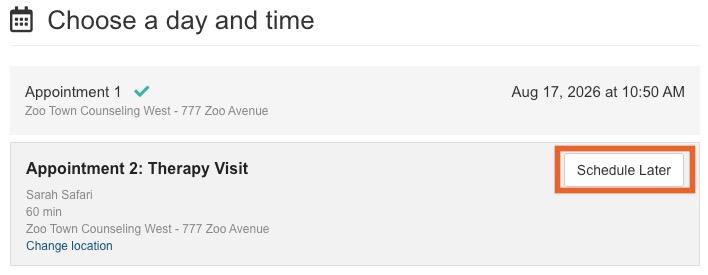
Modify the Client information fields in Booking widget (Multiple Fields)
Use this to modify the default field labels for clients to complete on the Client Information page.
<style>
form[name=bookingForm] label[for=name]::before{color:#333;content:"Child's Name"}
form[name=bookingForm] label[for=name] strong {display:none;}
form[name=bookingForm] label[for=email]::before{color:#333;content:"Parent's Email"}
form[name=bookingForm] label[for=email] strong {display:none;}
form[name=bookingForm] label[for=dob]::before{color:#333;content:"Child's DoB"}
form[name=bookingForm] label[for=dob] strong {display:none;}
form[name=bookingForm] label[for=phone]::before{color:#333;content:"Parent's Mobile Phone"}
form[name=bookingForm] label[for=phone] strong {display:none;}
form[name=bookingForm] input#name::-webkit-input-placeholder{color:#fff;} form[name=bookingForm] input#name::-moz-input-placeholder{color:#fff;opacity:1} form[name=bookingForm] input#name:-ms-input-placeholder{color:#fff;}
</style> 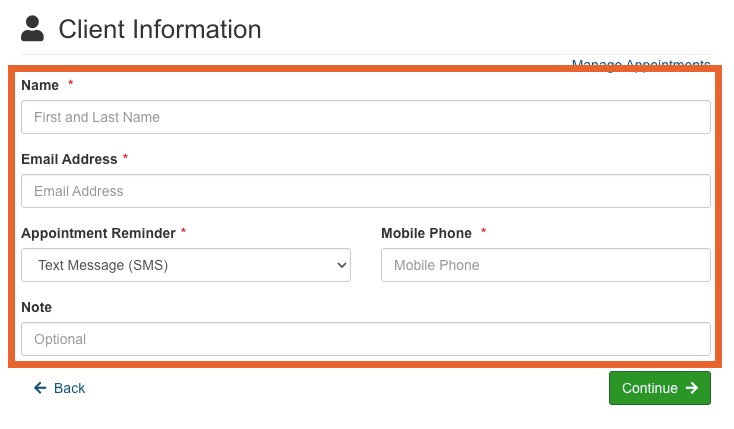
Insert Preferred Language in your Booking Widget
Use this to change labels and buttons in your booking widget to your preferred language. Replace the French labels below with your preferred language to customize.
.services .header {visibility:hidden;}
.services .header::before {content:"Choisir un Service"; visibility:visible;}
.services th.duration-column {visibility:hidden;}
.services th.duration-column::after {content:"Durée"; visibility:visible;}
.services th.price-column {visibility:hidden;}
.services th.price-column::after {content:"Prix"; visibility:visible;}
.services .btn-book-now {visibility:hidden;}
.services .btn-book-now::before {content:"Réserver"; visibility:visible; background-color:#F8F1ED; border-color:#CFC2BA; color:#616161; font-weight:bold; border-radius:3px; display:inline-block; padding:6px 12px; font-size:14px; line-height:1.42857143; text-align:center; white-space:nowrap; vertical-align:middle; border:1px solid transparent; -webkit-appearance:button; box-sizing:border-box;}
Replace "Manage Appointments" Text to Preferred Wording Via CSS
Use this to replace the "Manage Appointments" message; for example, you can change it to say, "View Appointments."
#manage-appointments {visibility:hidden;}
#manage-appointments::before {content:"Text goes here"; visibility:visible;}
Add Text to Final Pages of Booking Widget
Use this to add more text after the default message on the final page of the booking widget.
.success .header::after {content:"\A Please check your email for additional information regarding your appointment. \A"; white-space:pre; font-size:16px;}
Add Text to Calendar Selection of Booking Widget
Use this to add a message to clients under the Choose a day and time wording in your booking widget.
#widget-container .calendar .header::after {content:"\A \A If there is no availability, text my cell at 561-504-6669 to coordinate a call."; white-space:pre-wrap; font-size:16px; font-weight:normal;} 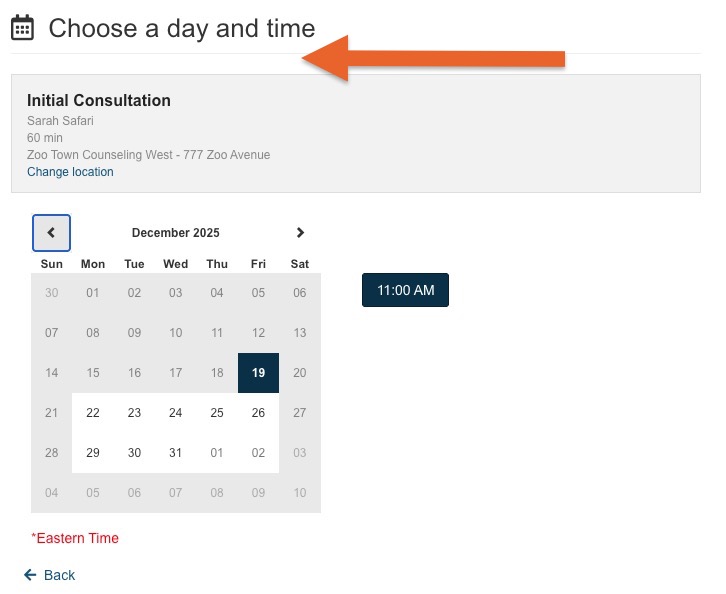
Add Text to Header of Booking Widget
Use this to add additional text to the header you created when you customized your mini-website. Make sure to test this customization on both mobile phones and PCs; it may cause the text to appear on top of header information.
