.png)
Secure Document Sharing
Secure Document Sharing allows you to send any documents in your PracticeQ account to a client or a third party.
How It Works
- Secure Document Sharing can be used to share a treatment plan with a client, send a signed consent form to an insurance company, share treatment notes with a specialist, and more.
- To make document sharing safe, we use 2 authentication channels - a secret URL sent via email, and an access code sent to the recipient's phone. This prevents man-in-the-middle attacks and breaches caused by a compromised email account.
- For additional security, each shared document has a mandatory expiry date (up to 14 days), and can be revoked at anytime.
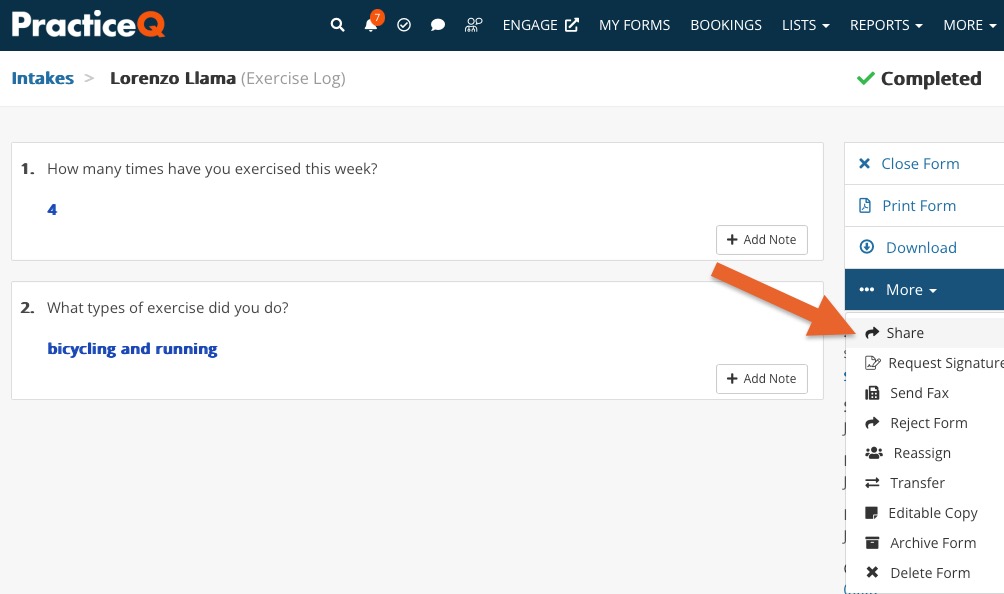
Share a Document
You will see the Share option on three kinds of documents: completed Intake Forms, signed Consent Forms and Client notes.
In the following example, we are sharing an Intake Form with a third party.
- Click Lists → Intakes.
- Open the document you want to share and click More → Share.
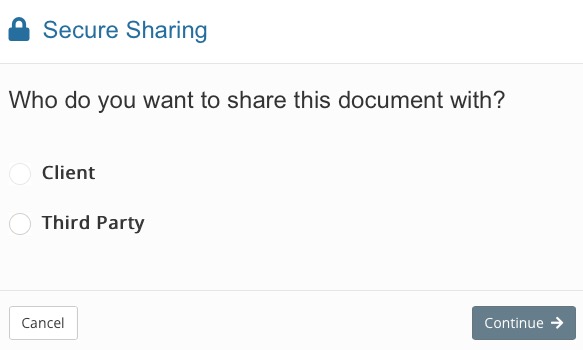
- Select who will receive the document.
- Choose how you will share the document.
- Email + Phone Authentication – When the recipient clicks on the link to open the document, an access code will be sent to their phone (via SMS or voice).
- Email + Secret Passcode – You will set a secret passcode and share it with the recipient through other means.
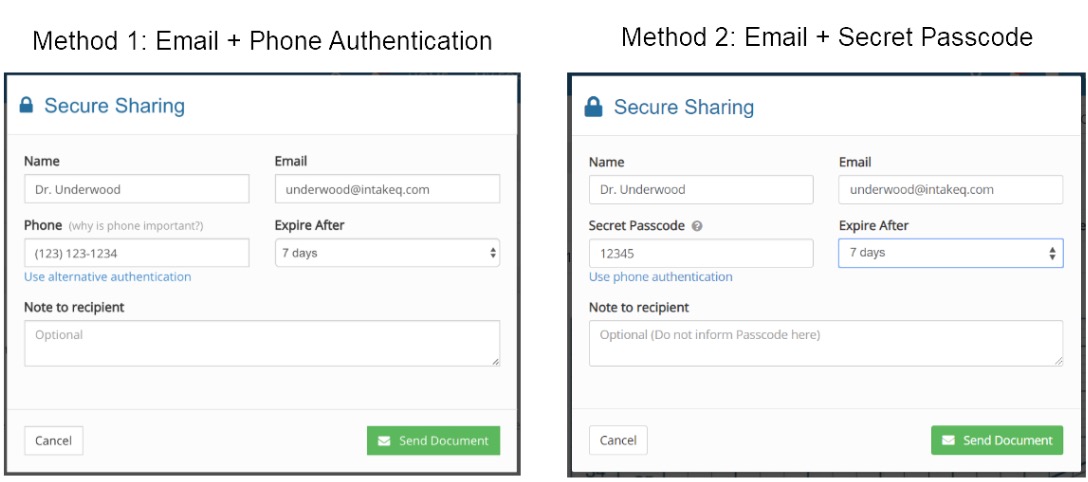
- Enter the recipient's Name, Email, Phone Number, Secret Passcode (if using Method 2), and Expiry Date. If you have sent a document to this recipient before, start typing their name and PracticeQ will populate the fields for you.
- Make sure that the email the phone number (if applicable) are correct, as they are needed to authenticate the recipient.
- Click Send Document. If you chose the Secret Passcode method, make sure to share that with the third party by other means.


Customize the Shared Document Email
- The email containing the secret URL can be customized in case you want to add your own instructions.
- The following article explains how to edit the default email template: Customize the Shared Document Email Template.
- We recommend that you share a document with yourself to view the process from the recipient's perspective.
Revoke Access to a Shared Document
- Click Lists → Clients.
- Open the client's profile and select the Shared tab.
- Locate the document for which you wish to revoke access.
- Click the Revoke link on the far right.
