PracticeQ gives your clients the ability to manage appointments they schedule with you, if you choose to enable this feature. This feature allows them to reschedule, cancel, or book a new appointment.
Reschedule an Appointment
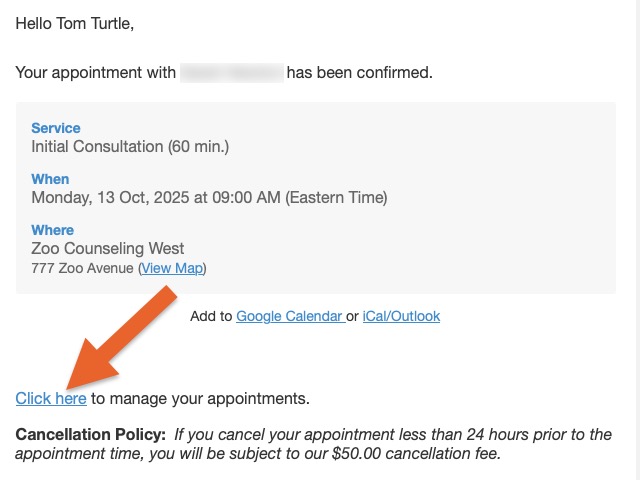
The client will receive an email about their upcoming appointment.
The email contains a link to manage their appointments.
Client will click the link and be taken to the Booking Login page, where they must enter their email address.
After they enter their email address, the client will receive an access code via email.
They client will enter the access code and click Login.
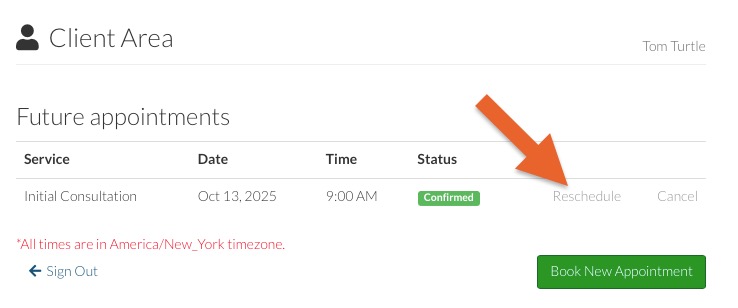
After the client enters the access code, they will see a list of all their scheduled appointments. To the right of each appointment is the Reschedule option.
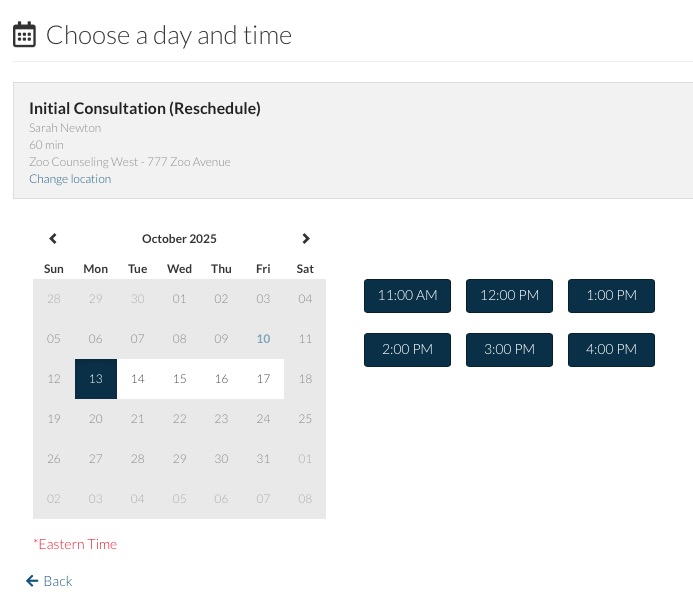
When the client clicks Reschedule, the appointment calendar with the available time slots for that service will appear. The client can then select the date and time to which to reschedule the appointment.After the client chooses the date and time, they will receive a confirmation of the new appointment.
When they click Reschedule Appointment, the new appointment will be saved.
Cancel an Appointment
The steps to cancel an appointment are very similar to the rescheduling process.
After the client enters their access code and is at the list of scheduled appointments, on the far right is the Cancel option.
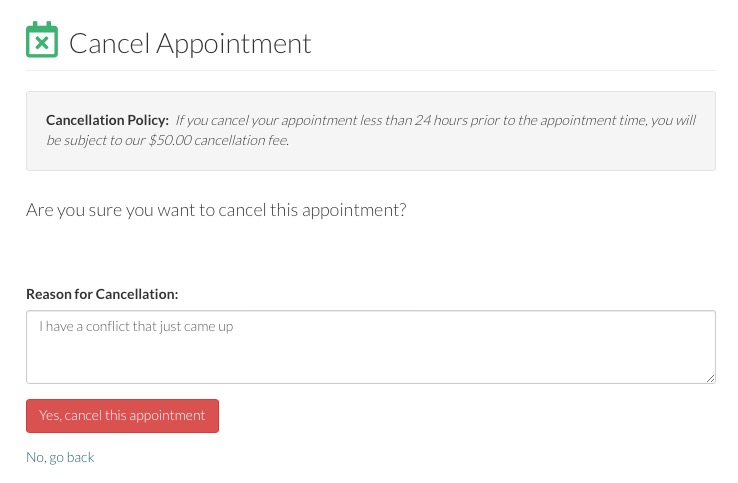
When the client clicks Cancel they will be taken to the cancellation confirmation page. Here, they can enter a reason for the cancellation to be passed on to the practitioner. The cancellation policy of the service will be shown, and if there are any penalties for cancelling, they will display as well.
After the client enters the reason for cancellation, they click Yes, cancel this appointment to finalize the cancellation.
Schedule Additional Package Appointments
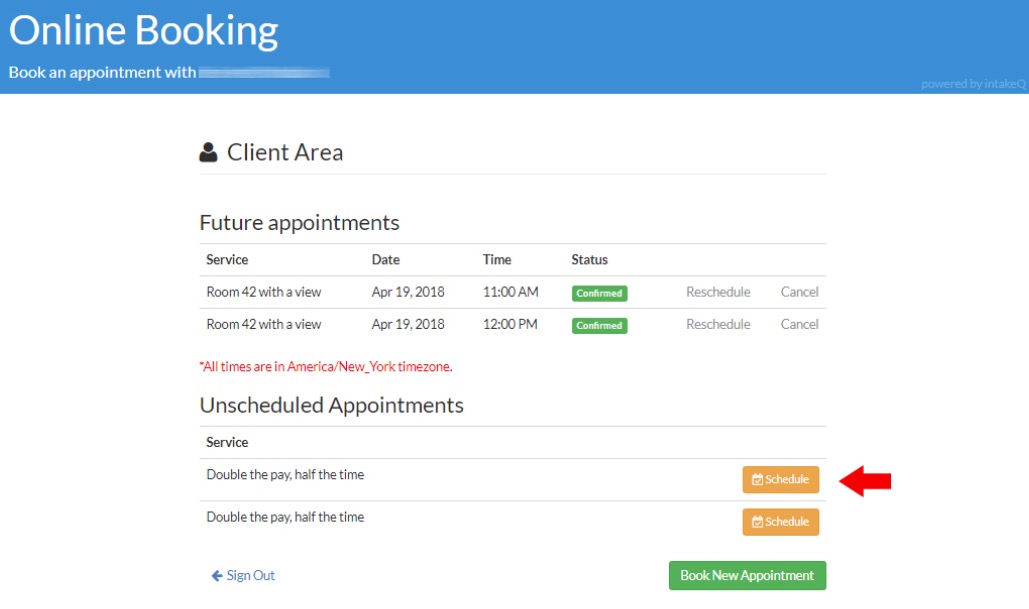
If a client signed up for an appointment package but has not yet scheduled all the appointments in the package, they can schedule the remaining appointments online.
To do this, they open the email they received after booking the package appointments and click Click here to manage the appointments.
They enter their email address and access code to gain access to the list of appointments in the package.
The client will see the unscheduled appointments below the scheduled appointments.
When the client clicks Schedule for then service, they will see a calendar and all the available time slots on that day. After they select the appointment date and time, they will enter their name and email address, and then click Continue to confirm the appointment.
If the client wants to book the remaining appointments, they may click Book another appointment.
.png)
 After the client chooses the date and time, they will receive a confirmation of the new appointment.

 After the client chooses the date and time, they will receive a confirmation of the new appointment.