Send Payment Receipts to Clients
PracticeQ allows you to manually send receipts to your clients, or set them up to send automatically when a payment is processed.
Send a Manual Receipt
- Click Lists → Invoices.
- Open the invoice in which the payment was processed.
- Verify that the invoice is paid by processing the payment or tracking a manual payment as needed. You will see a green paid tag by the invoice number at the top.
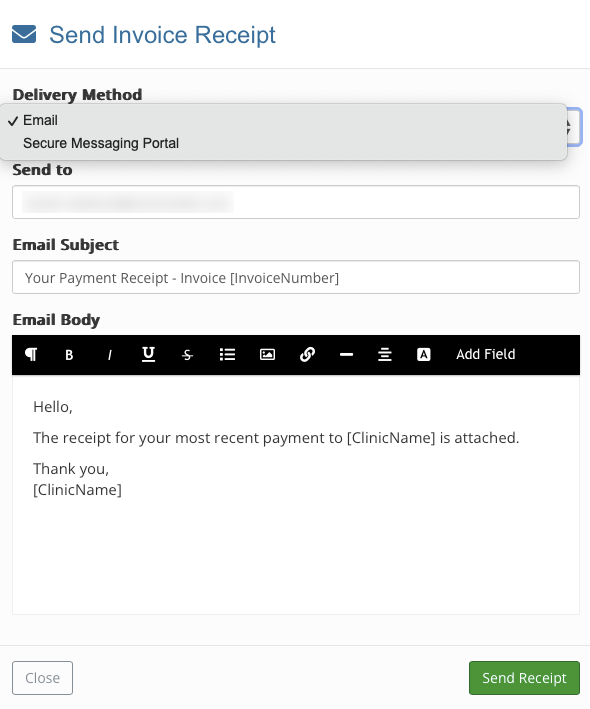
- On the invoice dialog, open the Actions dropdown menu and select Send Receipt.
- Verify:
- Delivery Method - Email or Secure Message Portal
- Recipient's email address
- Email Subject - Customize if desired
- Email Body - Change wording if needed
- Click Send Receipt.
Set Up Automatic Receipts
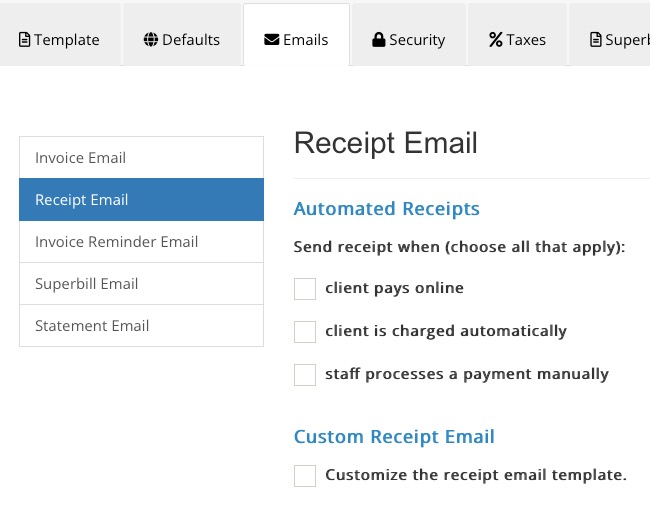
- Click Lists → Invoices → Invoice Settings.
- Select the Emails tab.
- Select the Receipt Email tab on the left.
- Under the Automated Receipts section you have options to send a receipt when:
- client pays online
- client is charged automatically
- staff processes a payment manually
- Make your selections and click Save.
Customize Receipt Information
- Click Lists → Invoices → Invoice Settings.
- Select the Template tab.
- Customize your business details, including adding a logo.
- Click Save Changes.
.png)

