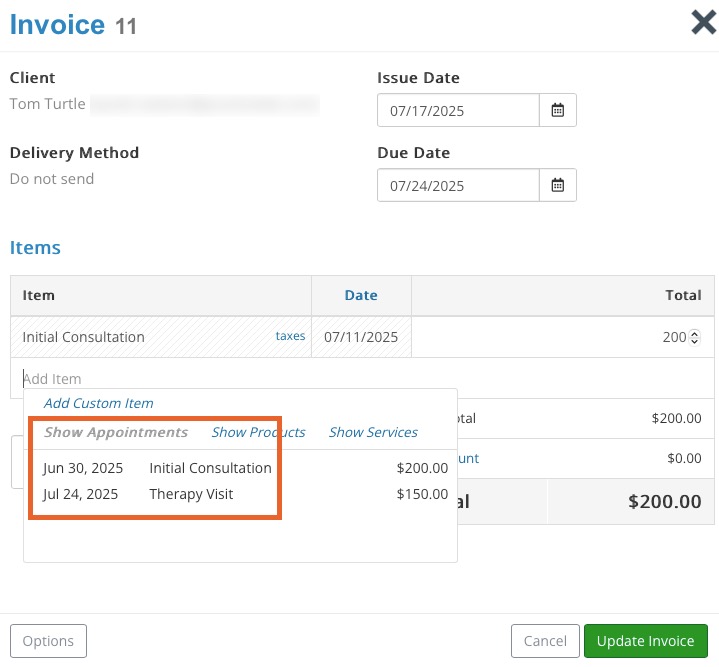
Create a Single Invoice for Multiple Appointments
If you manage invoices manually and you want to issue a single invoice for multiple appointments, follow these steps.
- Create a new invoice, or open an existing invoice.
- Select Actions → Edit Invoice.
- Under the Items section, click Add Item.
- You will see all the appointments for the client under the Show Appointments heading.
- Select the appointments you wish to add.
- Click Save Invoice or Update Invoice to save your changes.
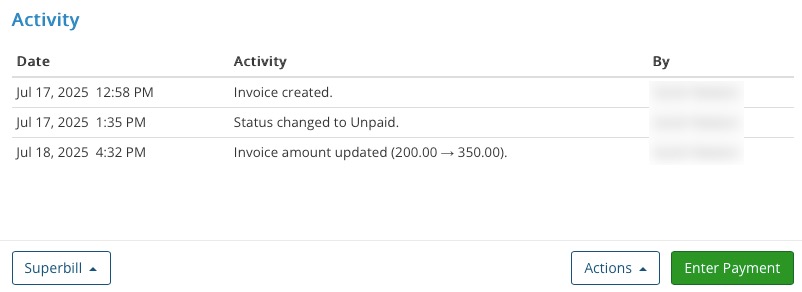
- If you updating an existing invoice, you will see your update under the Activity heading.
- You can use the Superbill or Actions menu this point, or Enter Payment.
No results found
.png)

