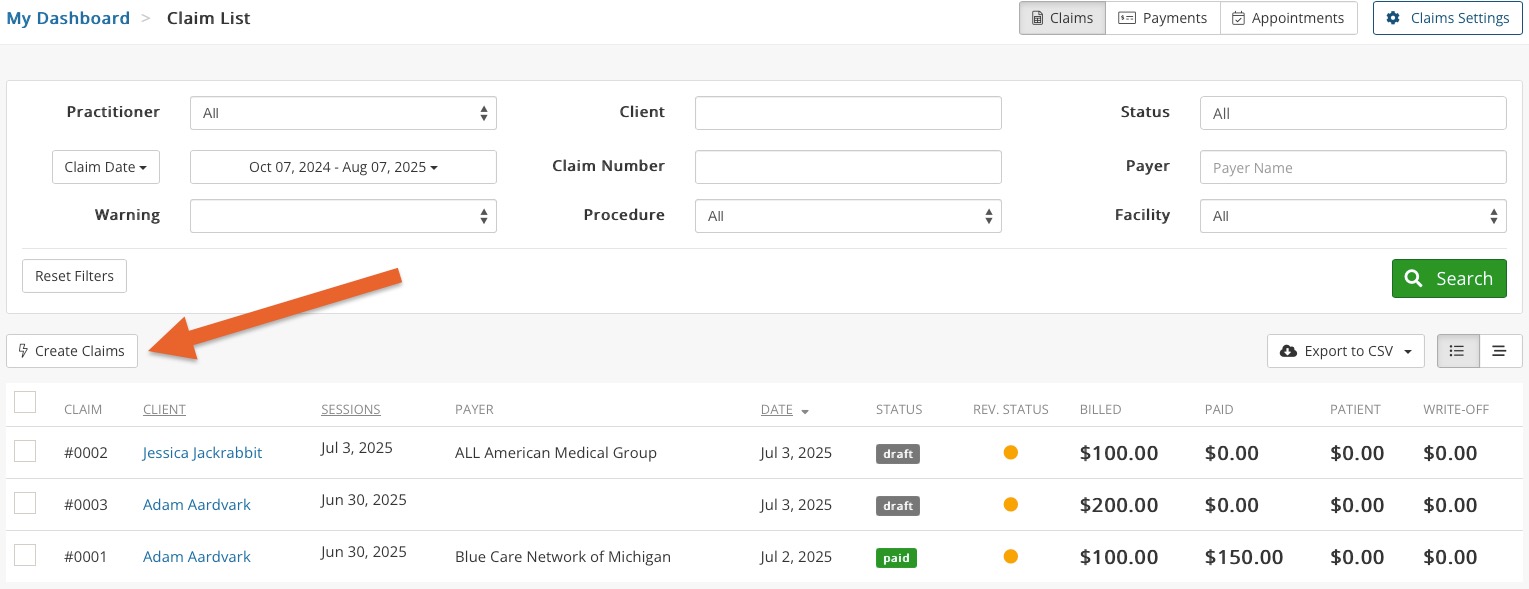
To save time, PracticeQ allows you to create claims in bulk instead of generating them one at a time. You can create claims in bulk for any appointments that don't already have a claim created.
Click Lists → Claims.
Click the Create Claims button on the bottom left.
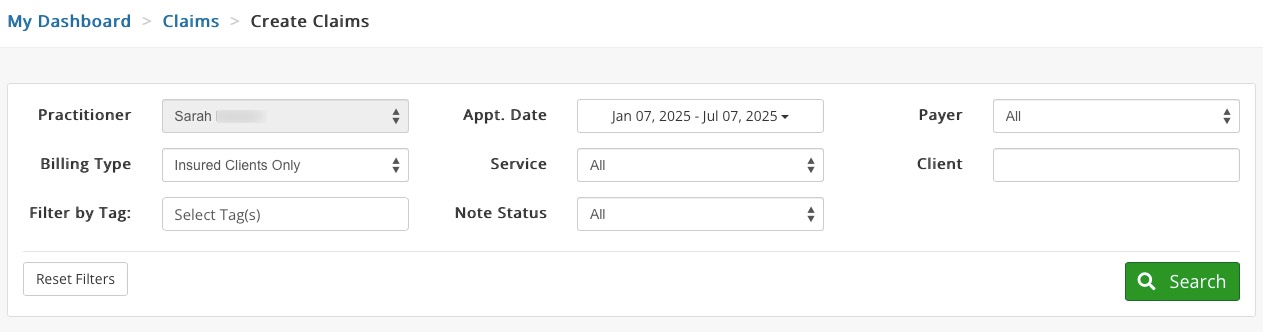
Enter the search filters to narrow down which appointments to include in the batch.
Click Search to generate a list of eligible appointments.
Select which appointments you want to generate claims for by clicking the checkboxes to the left.
Click the Create Claims button on the top right.
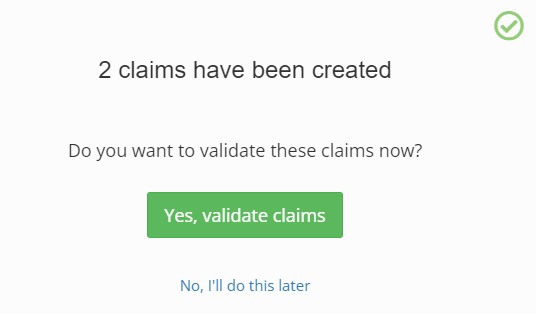
The system will generate the claims. Note: It will combine appointments for the same clients into a single claim.
PracticeQ will ask if you want to validate the claims. This is recommended to ensure that all required information is included before submitting it to the clearinghouse/payer. You can choose to validate the claims or not; you can choose to wait on this if you plan to submit the claims later.
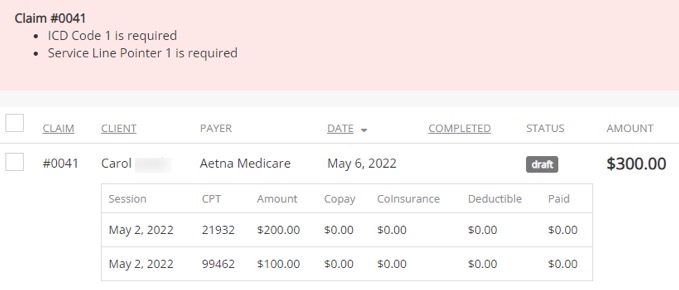
If a claim cannot be validated, the system will note it and keep the claim as a draft. This allows you to open the claim to make the necessary adjustments. The issues to be corrected will show in the pink bar on top.
Once the claims have been validated, you can perform bulk actions on your newly created claims. Check the boxes in the left column (all will be selected by default).
Click the Bulk Actions button on the top right, then select the action you'd like to perform, such as Change to Submitted or Export to EDI.
.png)