.png)
Extract Client Data
PracticeQ allows you to extract data from intake forms and client notes to CSV files, which can then be opened in Excel and many other applications.
Export Profiles
- An Export Profile allows you to define which fields you want to export data from.
- You can have multiple export profiles. For example, one to feed an EHR system, one to create an email list, and another one to create reports in Excel.
- Export Profiles do not need to be created every time you want to export data. Create them once, and then apply them to a list of intake forms!
Create an Export Profile
- Click More → Extract Data.
- Click Manage Profiles.
- If you have not created an export profile yet, click the New button.
- To create or manage existing profiles, click the Manage Profiles button.
- Enter a Name for the profile.
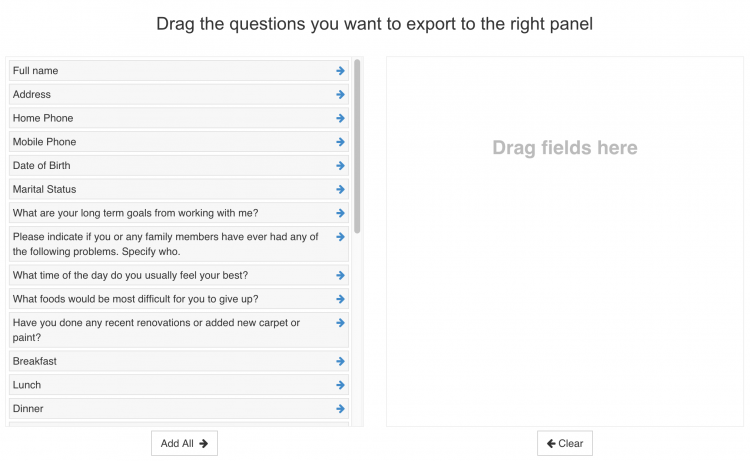
- Select the Questionnaire you want to pull data from. Once you select the questionnaire, the list of fields will load in the left panel.
- Drag the fields you want to extract to the right panel. These fields will be similar to columns in an Excel file.
- When you need to import data into another EHR, it is often necessary to name the columns according to the vendor specifications. To change the name of a column, click the gear wheel icon for the field you need to rename.
- Click Save.

Specifying the name of a column in the exported document.
Filter the Data
- When your export profile is complete, click Back to Export Page. You will see that the export profile you created is available and you can use it to extract data from intake forms.
- Select a Date Range.
- Click the Filter button.
- You will see a list of intakes. Check all, or check only the ones you want to export. You may also filter the results by Client Name, Email, or Tag.
- Click Export Selected Records to download the CSV file.
Export Single Forms
- To export a single form to CSV, open a completed form and click the Export to CSV button.
- This button will only be visible if there is least one export profile available for that form template.
Limitations
- Some question types are not available for extraction because they are not supported in CSV files. Examples include File Attachments, Signatures, and Appointment Details.
- If you have any questions or need assistance, please contact us and we will be happy to help!