.png)
How to Register Offline Appointment Payments
This article applies to the older IntakeQ invoice system. If you can access "Lists > Invoices" this article will not apply to you. The functionality is similar, you can access the invoice directly from the appointment dialog to track an offline payment.
IntakeQ enables your clients to pay for appointments online using your booking widget. However, there are instances where clients will pay offline through other means (cash, check, debit machine, etc.). To keep your information consistent, you can manually add payment information to each appointment by informing the payment method, amount and payment date.
To add payment information to appointments, follow the steps below:
- In your IntakeQ calendar, open an appointment that has not been paid online.
- When no payment information has been added to the appointment, you will see a "Enter Payment Information" link.

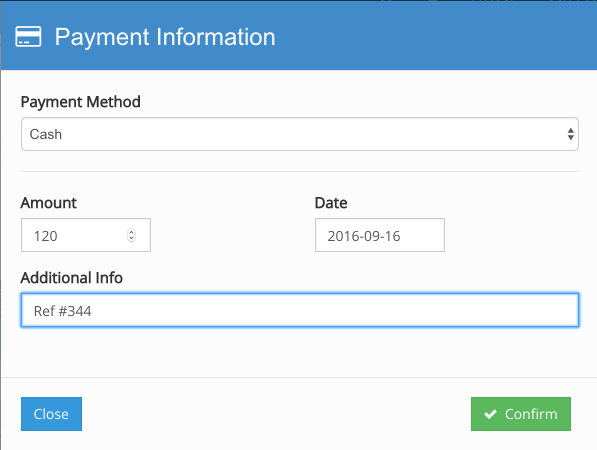
- Clicking on the link will open a popup that allows you to choose a payment method. Choosing Stripe or Square will let you enter a manual charge by entering the client's credit card information. Any other option will allow you to enter payment details manually.


Once you save the information, the appointment will have its status changed to "Paid" and you will be able to edit the information in case any mistakes were made.

All the payment information entered will be available when exporting appointments to Excel, allowing you to create your own reports.