.png)
Engage - Set Up Recall Requests
Engage offers recall requests to alert clients who need to schedule their next visit. Customize these messages and decide when to send them to your clients.
Select Services for Recall
- Click Engage from your PracticeQ toolbar.
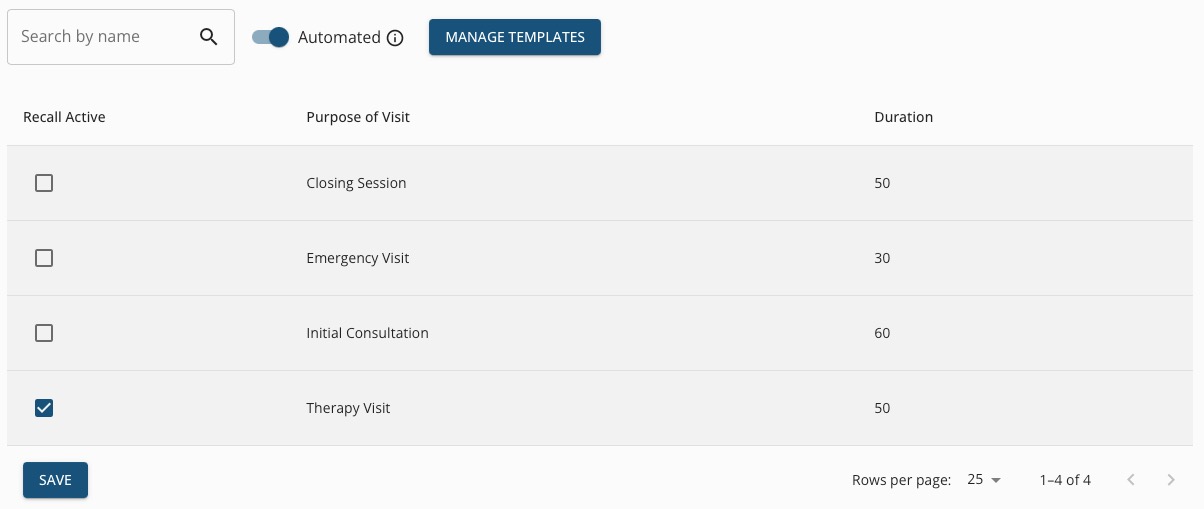
- Click Patient Recall → Settings.
- Check the Recall Active box for each Purpose of Visit for which you wish to send Recall requests.
- Click Save.
 Create Recall Request Templates
 Create Recall Request Templates
- Click Engage from your PracticeQ toolbar.
- Click Templates → Patient Recall.
- You will see some default templates, all labeled Recall. Some will say 30 days after last visit, some will say 60 days after last visit. You can change the timing of each message according to your preference.
- To add a new template, click Create New Schedule.
- For each message type, click the gear wheel icon to right of the title.
- Give the template a Friendly Name, if desired. In our example, we named it Therapy Visit - Almost Due.
- Check off the Contact Methods you wish to use. You can use Text, Email, or both.
- From the dropdown menu, select the number of days after the last visit that you would like to send the recall request to the client. For our Therapy Visit example, we entered 28 days because we wish to see clients for this visit every 30 days.
- Under Weekday Settings, click the Enabled button under any day of the week you do NOT wish for this message to send, such as Saturdays and/or Sundays. The label under the selected days will change to Disabled.
- Under Purpose of Visit Filters, select to Only Send or Don't Send and then specify the Purpose of Visit. Note: In the example below, our message is set to Only Send to clients who completed a Therapy Visit 28 days ago.
- Click SAVE.
- Repeat this process for each Purpose of Visit you selected in the previous step.
Reminder: Make sure that you have marked the service as Recall Active in Patient Recall → Settings!
Note: When determining which patients should receive recall messages, Engage only uses appointment data from its initial sync with PracticeQ onward. This prevents a large number of patients from receiving recall messages immediately when recalls are first enabled for a service.

Edit Recall Request Messages
1. Click Templates → Patient Recall.
2. Click on each Message Type to edit, such as Text. You will need to do this for all the message types you choose to send.
3. Make edits to the message in the text box. Remove or add Variables as desired.
4. Review your message in the Preview on the right.
5. Click SAVE.

For more about Engage and how you can add it to your PracticeQ account, click here.