.png)
Engage - Get Started with Engage
Engage is a robust engagement platform featuring powerful tools to help your practice communicate with your client base.
Engage is available in the United States and Canada. Click here to explore Engage's features and schedule a demo.
Explore Engage plans and features
1. Click More → Settings → Integrations → Engage.
2. Click Learn More.
3. Review the features for the Engage Plus and Engage Premium plans.
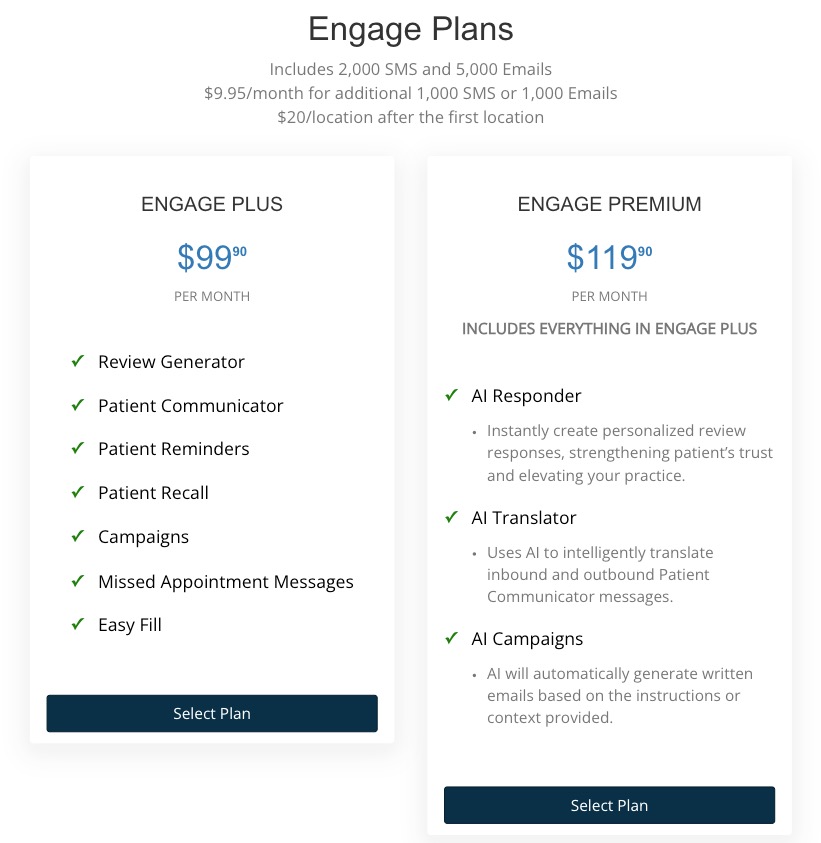
4. Choose the plan that works best for your practice; click the Select Plan button for the associated plan.
5. Next, enter your basic practice information so we can set you up!
6. Complete the Account Setup window with your practice information.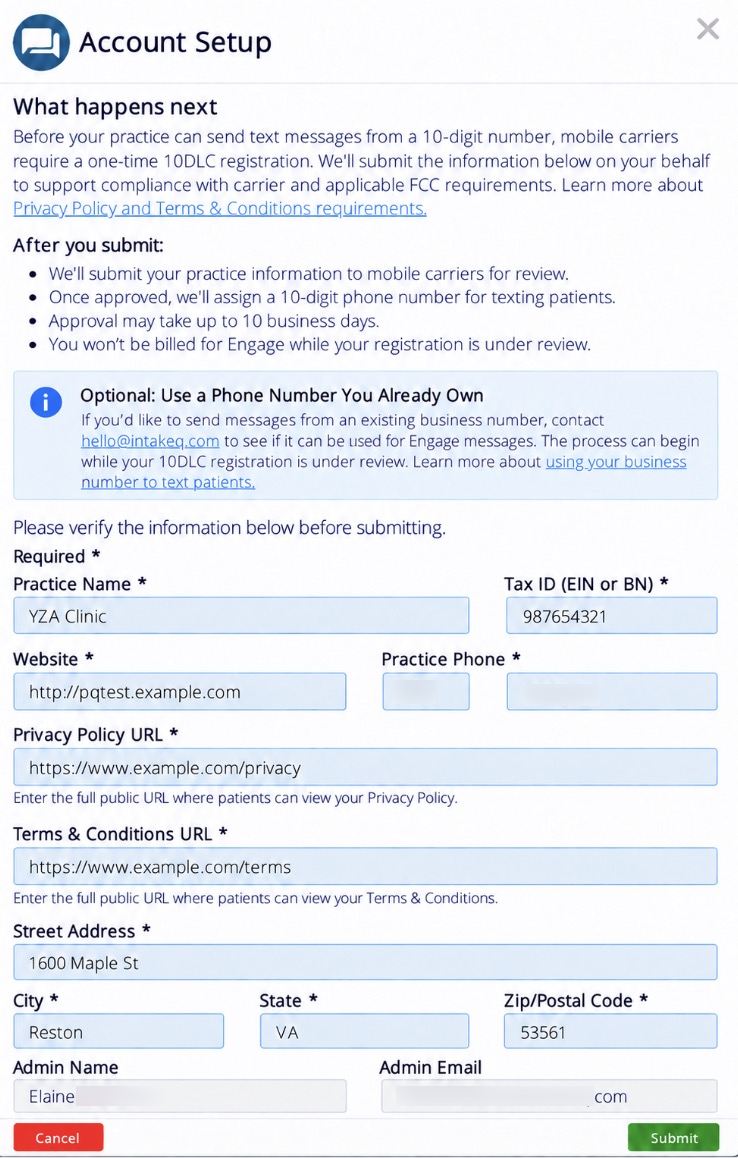
- Your practice name should reflect your legal business name.
- Enter your Tax ID in numbers only - no dashes.
- Make sure that your website is your official business website.
- Provide the URLs of your Privacy Policy and Terms and Conditions. For more information about Privacy Policy and Terms and Conditions requirements, click here or click the link provided in the Account Setup window.
- In the Admin Name and Admin Email fields, you must provide the first name, last name and email of an actual person at your practice. General titles, such as "Office Admin," will cause your application to be rejected.
7. Click Submit.
8. The 10DLC approval process may take up to 10 business days. Once you are approved, you will receive an email, and the Engage tool will appear on your PracticeQ toolbar.
9. Click the Engage tool on the toolbar. This will open Engage in a new tab, making it easy to switch back and forth between Engage and PracticeQ.
- Most users like to have Engage open in a separate window as they will be referring to it frequently throughout the day. If you have the ability to display two windows in a split screen setup, this can make things easier so you don't have to switch.
10. Continue to this article to move your templates from PracticeQ to Engage: Engage - Template Setup.
