.png)
Superbills for Appointment Packages
Superbills for appointment packages are more complex than superbills for single appointments. PracticeQ handles their validation differently as well.
IMPORTANT: If you need to generate multiple superbills over time from a single appointment package invoice, you will most likely want to disable superbill storage. If you do not, you will need to delete the stored superbill each time you try to create a new one for that package. This article shows how to complete the process with superbill storage OFF.
***When creating the superbill from the package invoice, note that the CPT codes set in the booking settings will not appear here. You would need to add it manually. See below for another option where the CPT codes are to be populated manually.***
Generate a Superbill for an Appointment Package
- Click Lists → Invoices.
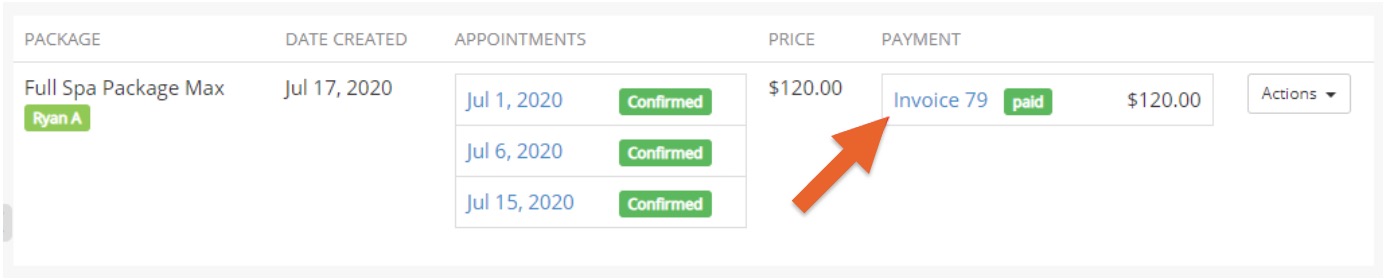
- Open the invoice tied to the package. The example below shows the package and the associated paid invoice.
- Click the link for the package invoice.
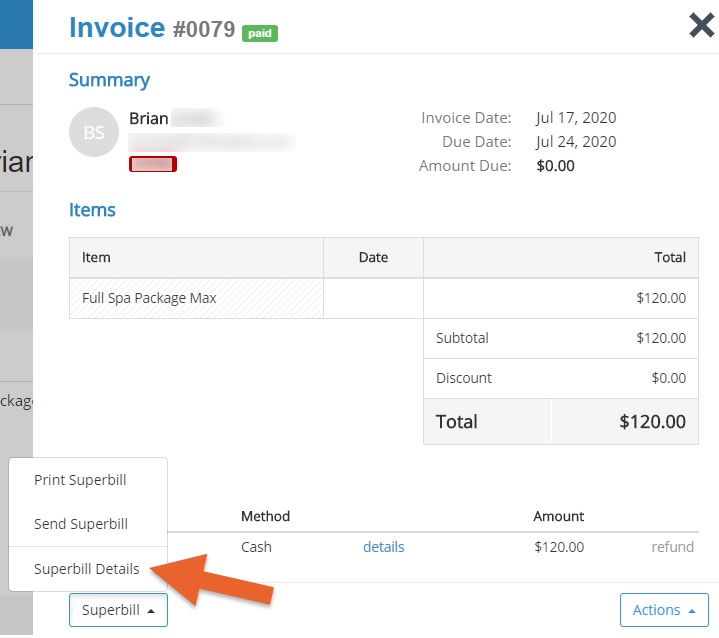
- Click Superbill → Superbill Details.
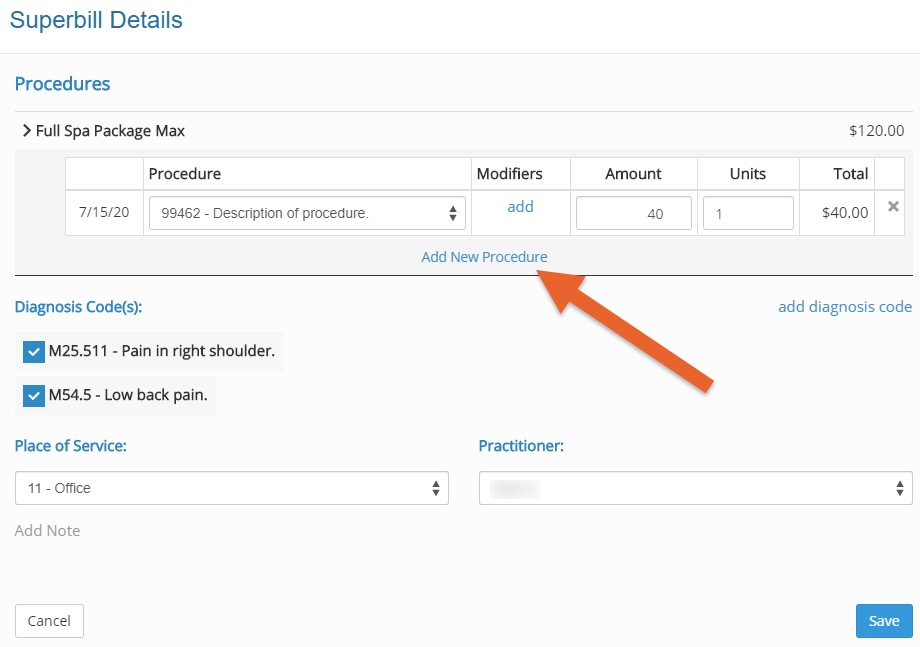
- When creating the superbill from the package invoice, note that the CPT codes set in the booking settings will not appear here. You would need to add it manually. See below for another option where the CPT codes are to be populated manually.
- If you are creating the superbill for the Package and only once certain appointments listed, please use the X option to the right to remove any unwanted appointments from this superbill.


Notes:
- When creating superbills for packages, the total procedure price amounts do not need to add up to the total cost of the appointment, as validation is disabled in these cases. Everything else is the same as a normal superbill.
- If generating a bulk superbill, the date range needs to include the invoice date if it's different from the date of the first appointment in the package.
Generate a Second Superbill from the Same Package Invoice
If you generated a partial superbill for a package (as we did in the example above), you will likely need to generate a second superbill for that same package.
- Open the superbill you just created.
- Delete any procedures that you already included on the previous superbill using the X icons.
- Click Add New Procedure, then re-add the previously removed appointment. Set the date, procedure, and other pertinent information.

We end up with the following when creating a superbill for the last remaining appointment in the package. The output will only contain the one appointment procedure, not the ones that we manually removed. Below is the output of our second superbill for that same package invoice.

Create a superbill with CPT codes added automatically
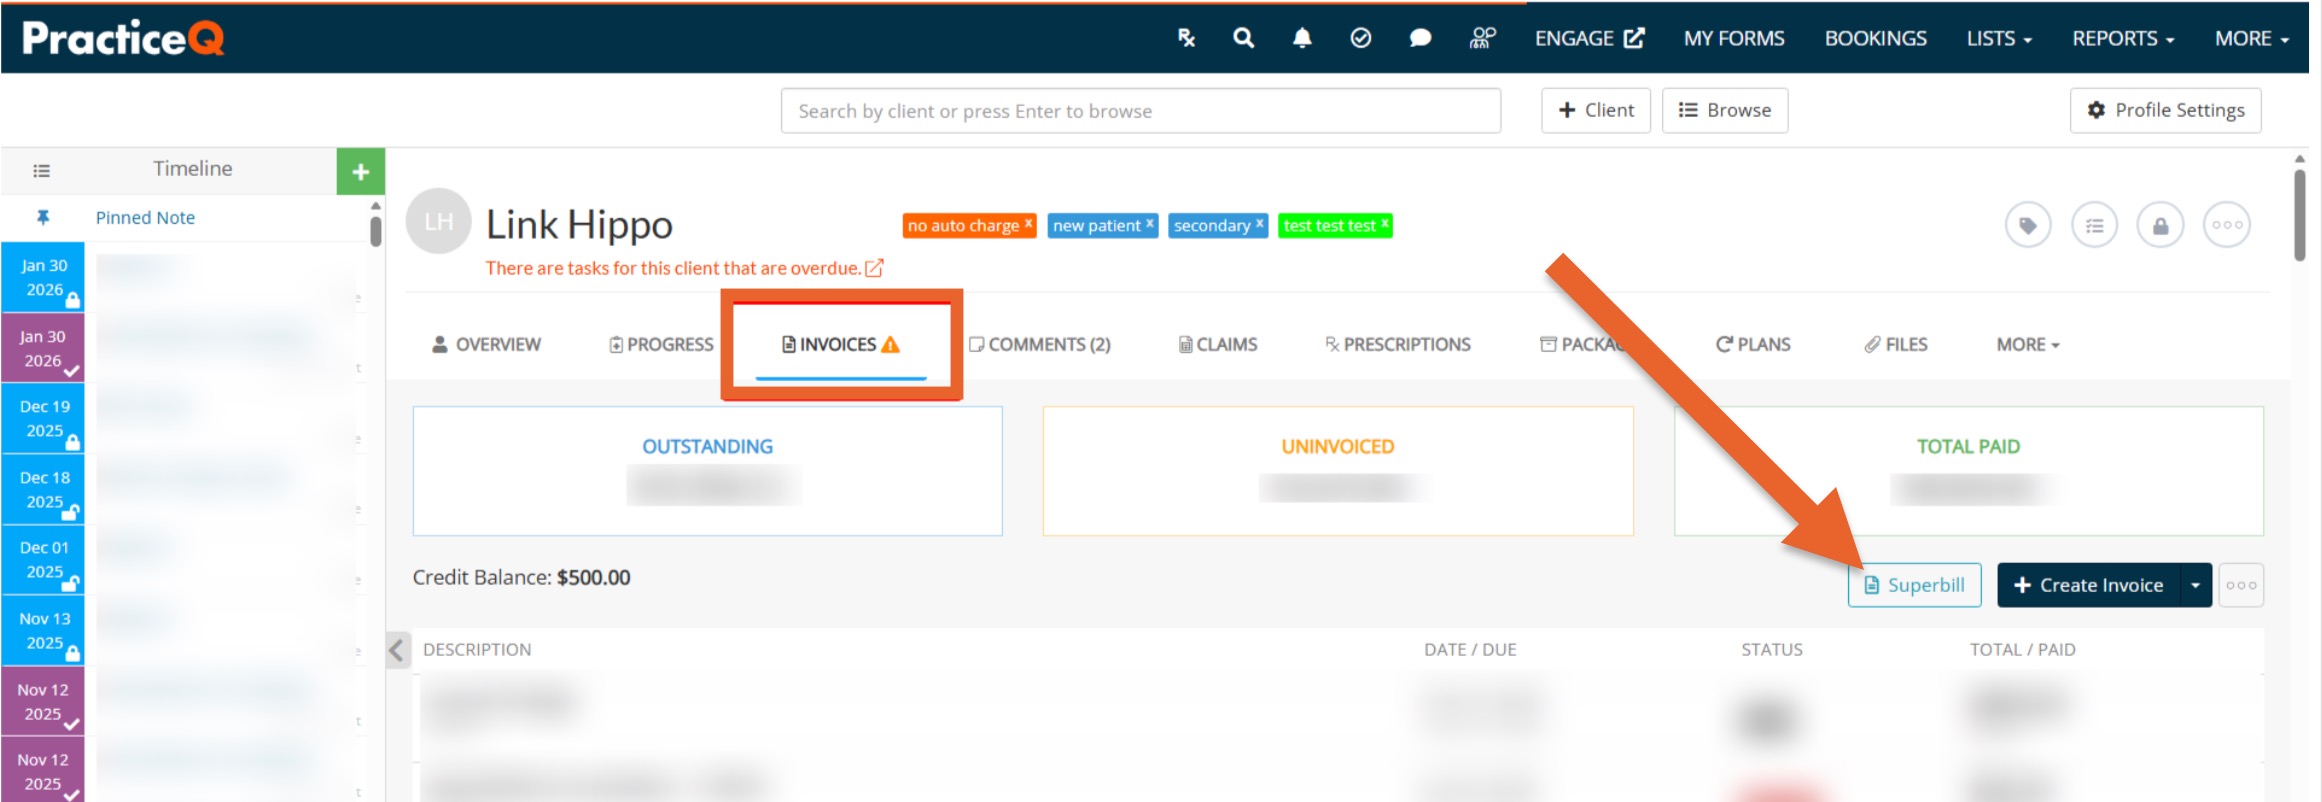
- Open the client's profile.
- Select the Invoices tab.
- Click the Superbill button.
- Choose the date range of the appointments in the package.
- All appointments in the package will appear in order. If you have appointments not linked to the package and do not want them present in this superbill, use the X option in the top right.


Reach out to hello@intakeq.com if you need more information.