.png)
Customize Client Portal Invitations
When you invite a client to the Client Portal, PracticeQ sends them an email invitation, as well as an SMS invitation.
Read more about how to invite clients to the portal here.
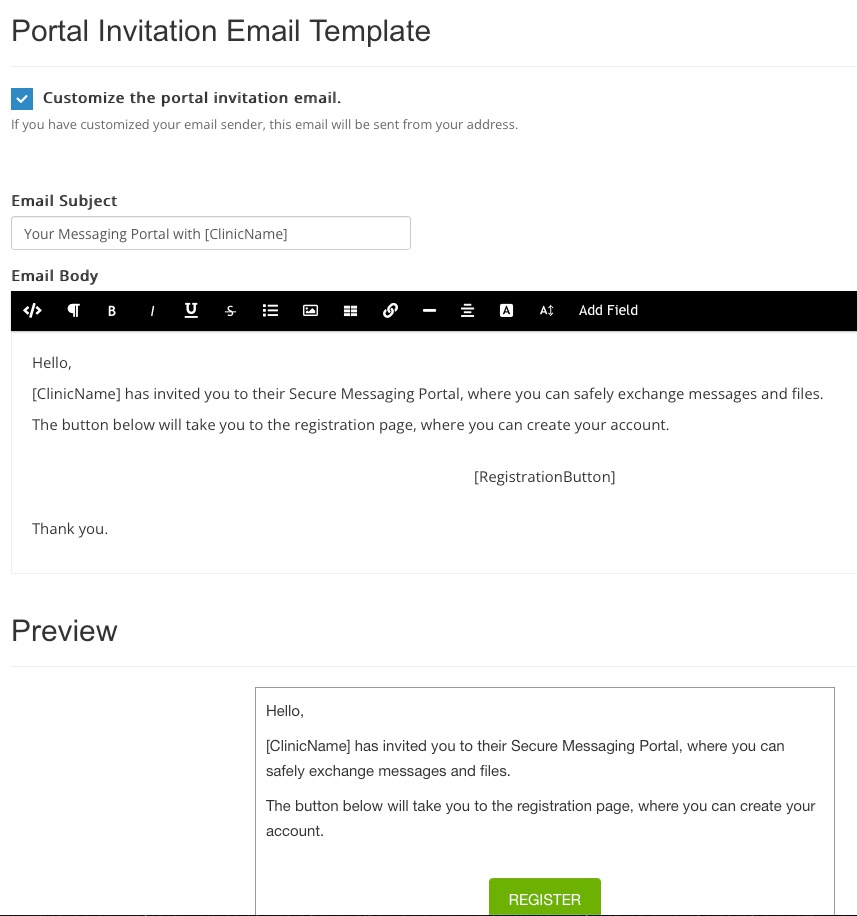
Customize the Email Invitation
You can provide a more personal experience to your clients by customizing these emails. Additionally, you can use our Custom Email Sender feature to make all these emails come from your own address.
To customize the emails, follow the steps below:
- From the home page, click the speech bubble icon on the top menu.
- Click the Settings button.
- Select the Message Templates tab.
- Check the box labeled Customize the portal invitation email.
- Editing windows will open, allowing you to customize the Email Subject and Email Body.
- Use the Add Field button to add pull in variables.
- Review the Preview at the bottom of the screen.
- Click Save.

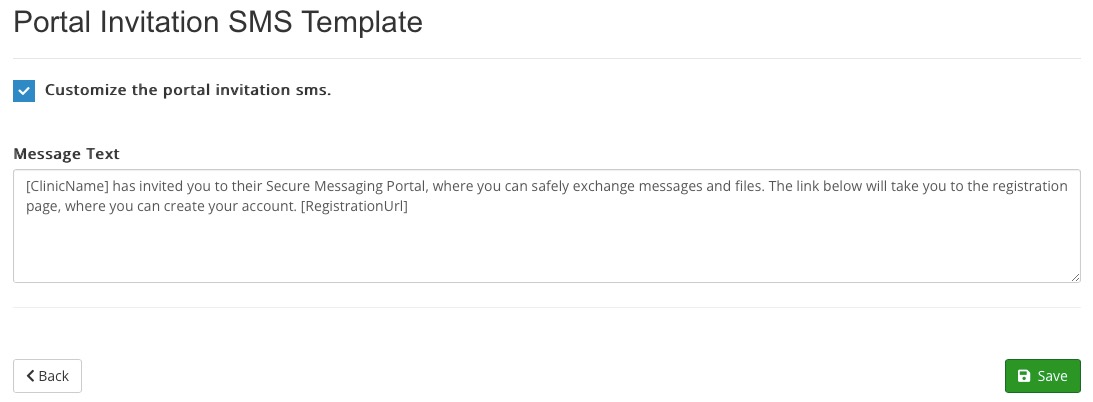
Customize the SMS Invitation
- From the home page, click the speech bubble icon on the top menu.
- Click the Settings button.
- Select the Message Templates tab.
- Check the box labeled Customize the portal invitation sms.
- Customize the text message content.
- Click Save.