.png)
Engage - Set Up Your Save the Date Message
Send a Save the Date message to allow clients to easily add their appointments to their calendars as soon as they book.
- Click Engage from your PracticeQ toolbar.
- Click Templates → Appointments.
- Scroll down to Save the Date and click the gear wheel icon next to the title.
- If you do not like the Save the Date title, give the template a Friendly Name.
- Place a checkmark next to each Contact Method you wish to use. You can use Text, Email, or both.
- Save the Date messages can be triggered for appointments scheduled up to one year in advance.
- The default date range is 365-30 days
- If you wish, you may change the maximum value; you will see the range update in the template title.
- If desired, click ADD FILTER and elect to send or not send to specific patient groups. In our example below, we set the message to NOT SEND to the Therapy Visits patient group.
- Under Weekday Settings, click the Enabled button under any day of the week you do NOT wish for this message to send, such as Saturdays and/or Sundays. The label under the selected days will change to Disabled.
- Click SAVE.
IMPORTANT: If the Save the Date message is scheduled to send on the same day as a regular appointment reminder, the appointment reminder will send INSTEAD OF the Save the Date message.

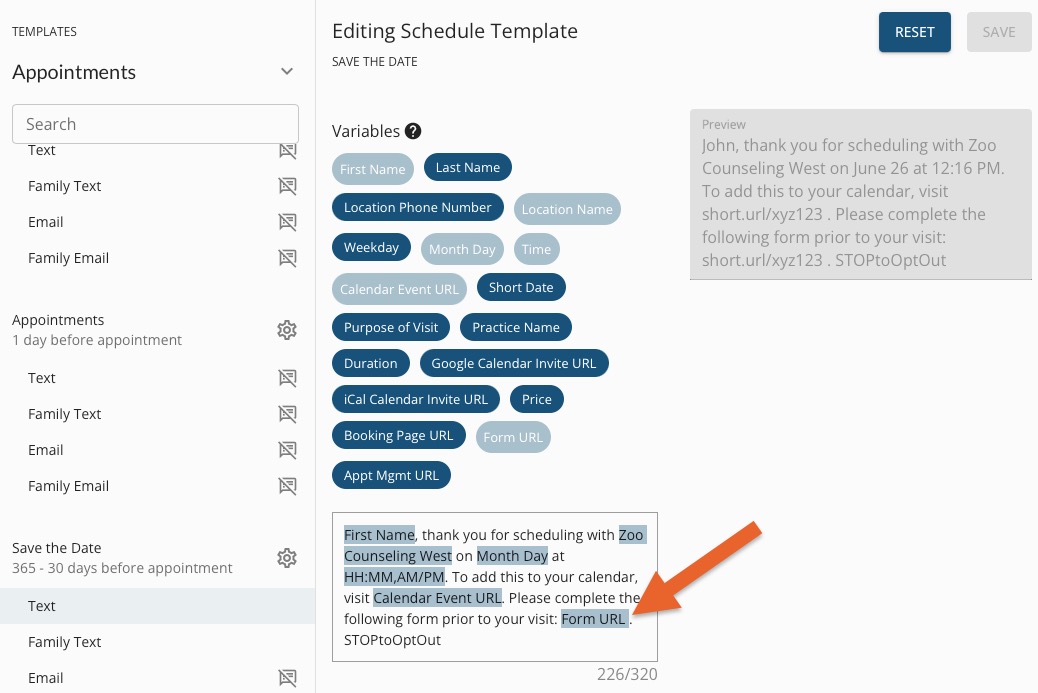
- Click on each chosen Contact Method and customize the wording, if desired.
- Select your desired Calendar URL variable from the Variable menu.
- Note that you can also include a Form URL variable.
- Click SAVE.
-
The Save the Date message will send to the client immediately after they schedule their appointment, as long as they schedule during business hours and within the 30-365 day window.
-
For more about Engage and how you can add it to your PracticeQ account, click here.
