.png)
Engage - Send an EasyFill Request
A client just canceled their visit; you now have an open slot on your schedule. Prevent revenue loss with EasyFill!
- You have two ways to access EasyFill requests:
- Click the Waitlist button from your Booking calendar in PracticeQ.
- Click Engage from your PracticeQ toolbar, then click EasyFill → Waitlist.
- Click New Request.
- Choose an option:
- Add Opening: this allows you to manually enter the time and date for the request.
- Existing Openings: this pulls appointment dates/times that have recently opened up due to a reschedule or cancellation.
- Click NEXT.
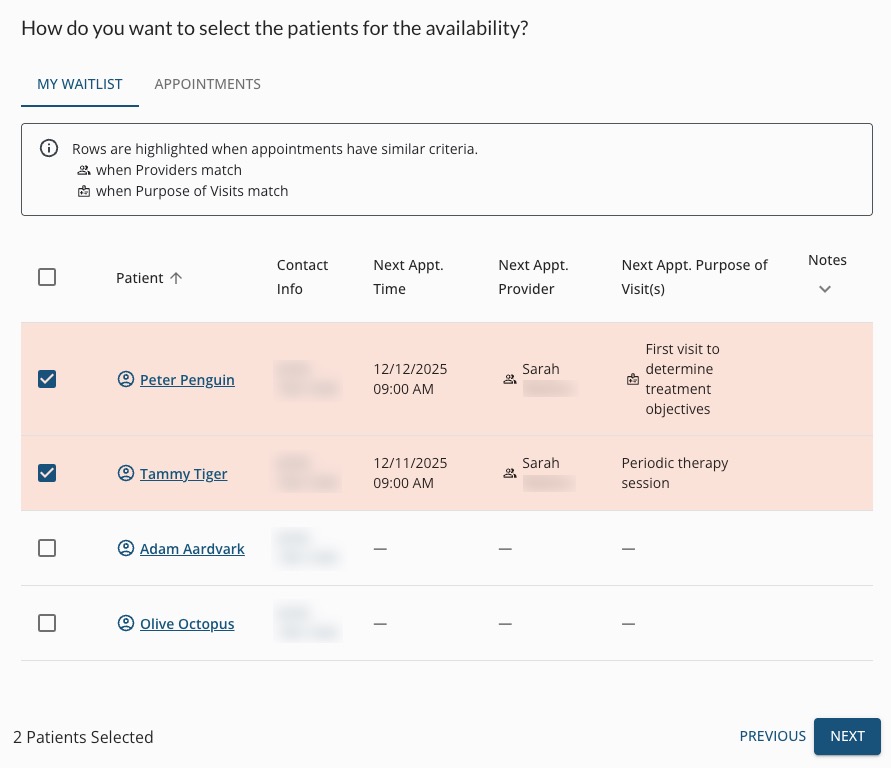
- In the next window, you will see all clients currently on the Waitlist. You can select clients in one of two ways:
- My Waitlist: for this option, you will check off the names of all clients to whom you want to send a request. You can select up to 25 clients.
- Appointments: for this option, Engage will highlight specific clients on the list with matching providers and visit information.
- You may select some patients from the My Waitlist view and some from the Appointments view if you wish; Engage will compile a list combining your selections.
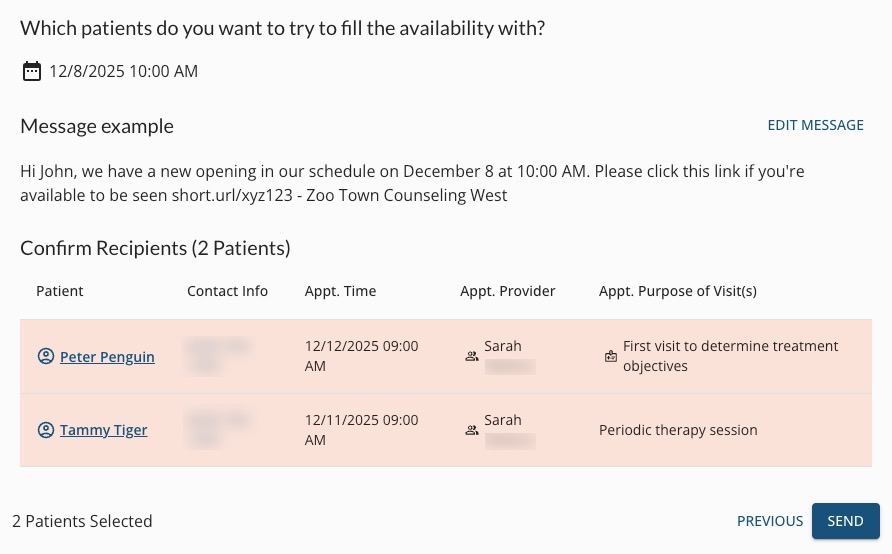
- Once you have selected your client group, you will see a window titled Which patients do you want to try to fill the availability with?
- Review the information in this window to confirm the list of clients is correct. Review the message example; if you want to change the wording, click Edit Message.
- When done, click SEND.
- Once you have sent a request, Engage will take you to the Requests page where you can see all your EasyFill campaigns and their current statuses.
- Your staff will receive notifications via email and in the dashboard each time a client confirms availability for an EasyFill request.


For more about Engage and how you can add it to your PracticeQ account, click here.