.png)
ePrescribe: Invite Supporting Users and Supervisors
Your clinic admin can invite other prescribers, supporting users or supervisors in your ePrescribe settings.
Are you a solo practitioner who needs to add a Supporting User to be approved for EPCS, but you do not want to add them as staff in PracticeQ? If so, please use this article: Invite a Supporting User for EPCS Approval.
Invite Prescribers
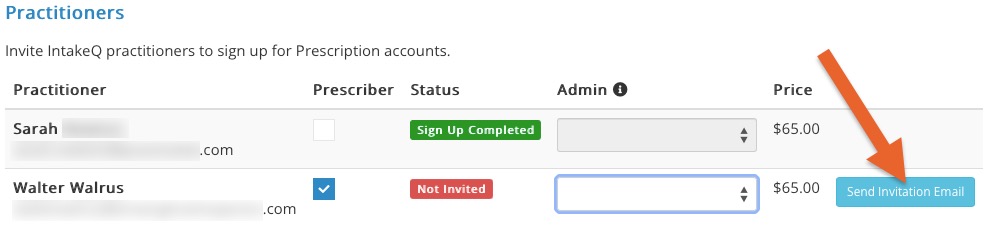
- Click More → ePrescribe.
- Scroll down to Practitioners.
- Choose the Practitioner you want to invite from the list and click the blue Send Invitation Email button. This will send the practitioner an email for them to complete to sign-up process.
- If you do not want this practitioner to prescribe medications to clients, uncheck the Prescriber checkbox.

Invite Supporting Users
- Click More → ePrescribe.
- Scroll down to Assistants.
- Choose the Assistant you want to invite from the list and click the blue Send Invitation Email button.
- This will send the assistant an email for them to complete the ePrescribe sign-up process.
- Supporting users do not need an ID.me account.
- Once an assistant is approved, they will have access to the Prescription tab on the client profile and can queue up prescriptions for the prescribers by clicking the + Add New Medication button.
- Once the details of the prescription are complete, they will see a button to Queue to Provider for Approval.
Invite Supervisors
- Add a supervisor by having the admin go to ePrescribe settings (More → ePrescribe).
- Scroll down to Assistants.
- Locate the user you wish to add as a supervisor, or add them as an assistant if they are not yet in your PracticeQ account.
- Click the blue Send Invitation Email button next to their name.
- This will send the user an email for them to complete the ePrescribe sign-up process.
- Once the user is active in ePrescribe, email hello@intakeq.com. Include the following information:
- User Name
- Request for user to be marked as a Supervisor in ePrescribe
Note: It does not matter if the user is set as Basic or Full Administrator; either will work.
Include Supervisor on Prescriptions
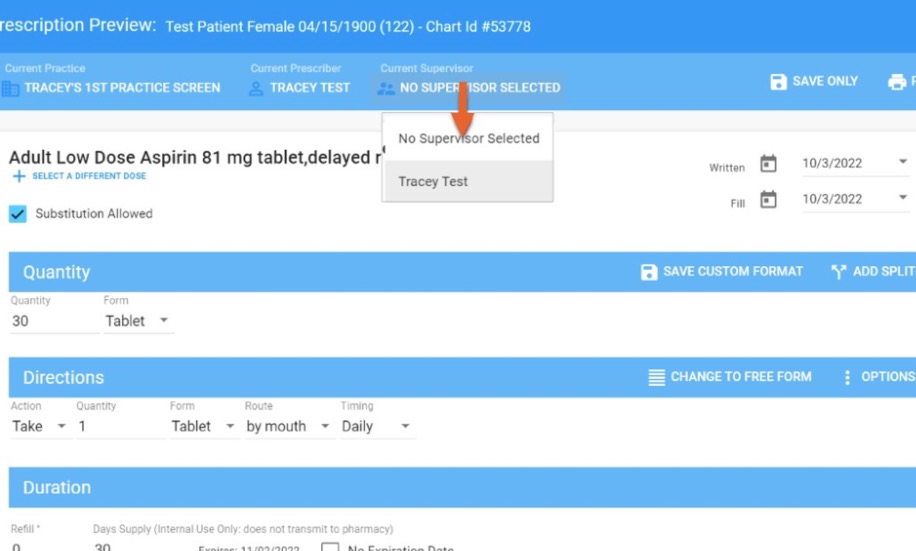
- Once the supervisor has been established, open a client's Prescription tab and prescribe a new medication.
- From the Prescription Preview page, click No Supervisor Selected.
- Select the appropriate supervisor.
- This selection should stick; you will not need to select it next time.

Need more help? Email us at hello@intakeq.com.