.png)
Set Up Online Booking and Payment
PracticeQ offers a simple and affordable appointment management solution that includes an online scheduling widget and payment processing.
What is the Booking Widget and How Does it Work?
- A booking widget is a self-contained application that you can place anywhere on your website to enable your visitors to book appointments online.
- It works by copying and pasting a piece of code onto your website. But before you do that, you need to set up what the widget will display, such as what services you offer, what times you are available, and how customers will pay you.
- This guide will show you how to set up your booking widget and how to get the code that you need to paste in your website.
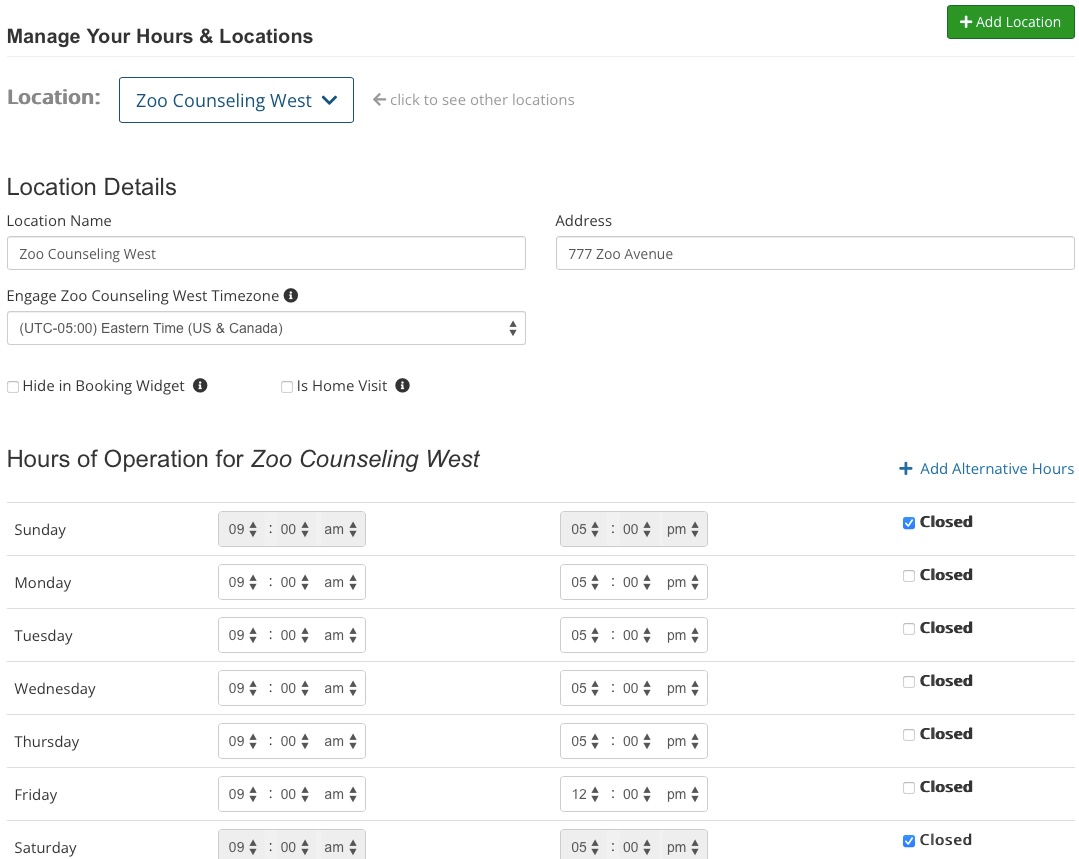
1. Set Up Your Locations and Hours of Operation
- Click Bookings → Booking Settings.
- Select the Hours/Locations tab.
- Select the location from the dropdown menu.
- Scroll down to the Hours of Operation heading and set the hours for each day. Check the Closed checkbox for days you will not see clients.
- Repeat for each of your practice locations.

2. Set Up Your Services
Next, enter the services you offer.
- Click Bookings → Booking Settings.
- Select the Services tab.
- Click the + Add Service button.
For more information on how to customize your services, read Add Services.

3. Connect PracticeQ to a Payment Provider (optional)
If you want to receive online credit card payments from your clients, you must connect your PracticeQ account to a Payment Provider. If you don’t want to receive online payments, skip to the next section.
- Read Supported Payment Providers to see the payment providers we integrate with depending on your location.
- All the supported provides allow you to accept credit card payments online. They are free to set up and you are charged a fee for each transaction, as with any credit card provider.
- Click Bookings → Booking Settings.
- Select the Payments tab.
- Select the payment provider you will use and follow the instructions for integration.
- When the integration is complete, you will be redirected back to PracticeQ and you should see a success message in the Payments tab.

Payment Settings and Cancellation Policy
- Customize your payment settings and cancellation policy to automate payments and increase revenue.
- Read more here: Payments Tab in Booking Settings.
4. Review the Settings Tab
- The Settings tab has several options that allow you to tweak how your booking widget behaves.
- Learn more about these options in Settings Tab in Booking Settings.
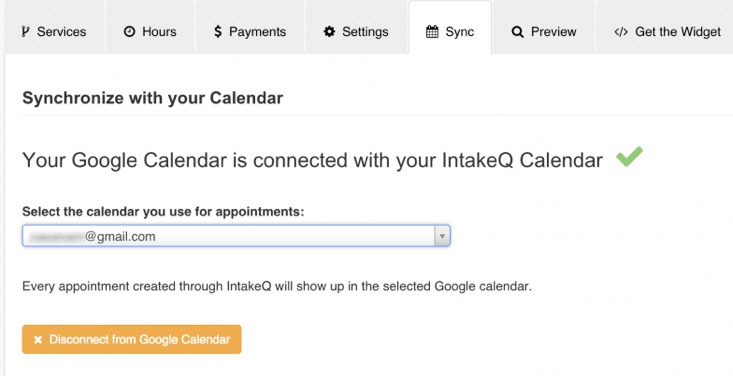
5. Sync with External Calendar
Connecting PracticeQ to your external calendar (Google or Outlook calendar) offers two great benefits:
- Every appointment made through the booking widget will automatically be created in your external calendar.
- The booking widget will use your external calendar to determine your availability before displaying your open spots.
Give PracticeQ permission to access your external calendar:
- Click Bookings → Booking Settings.
- Select the Sync tab.
- Click the button(s) Connect with Google Calendar and/or Connect with Outlook Calendar.
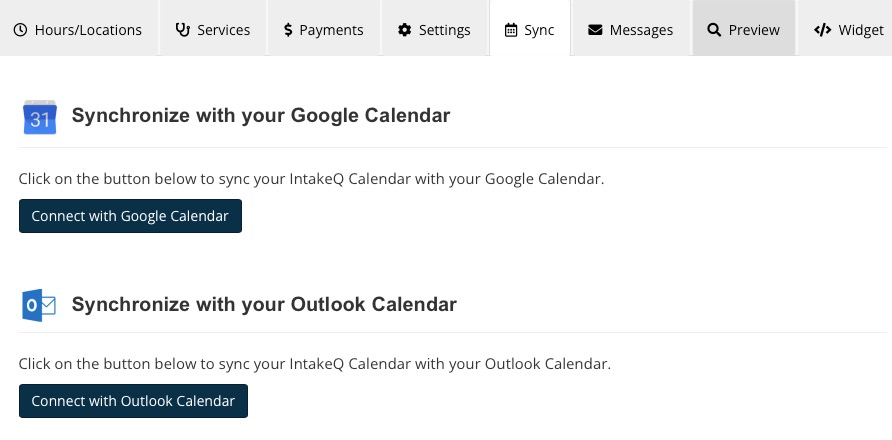
- PracticeQ will ask you to authenticate your Google/Microsoft account to give access to your calendar. Once permission is granted, you should be redirected back to PracticeQ and see a success message in the Sync tab.


6. Preview and Test Your Widget
- Click Bookings → Booking Settings.
- Select the Preview tab.
- A preview of your Booking Widget will display.

7. Place the Widget in Your Website
- Click Bookings → Booking Settings.
- Select the Widget tab.
- Copy and past the code snippet for use on your website. The widget background is transparent, so it will naturally blend with the background color of its container in your website.